Notari Guide for N1 Pro

Welcome to Notari.
This guide helps N1 Pro Notetaker users connect, record, and use Notari’s transcription, AI summaries, text notes, and AI Q&A.
Notari helps you capture conversations, understand them, and turn them into ideas you can build on.
1. Meet Your N1 Pro Notetaker
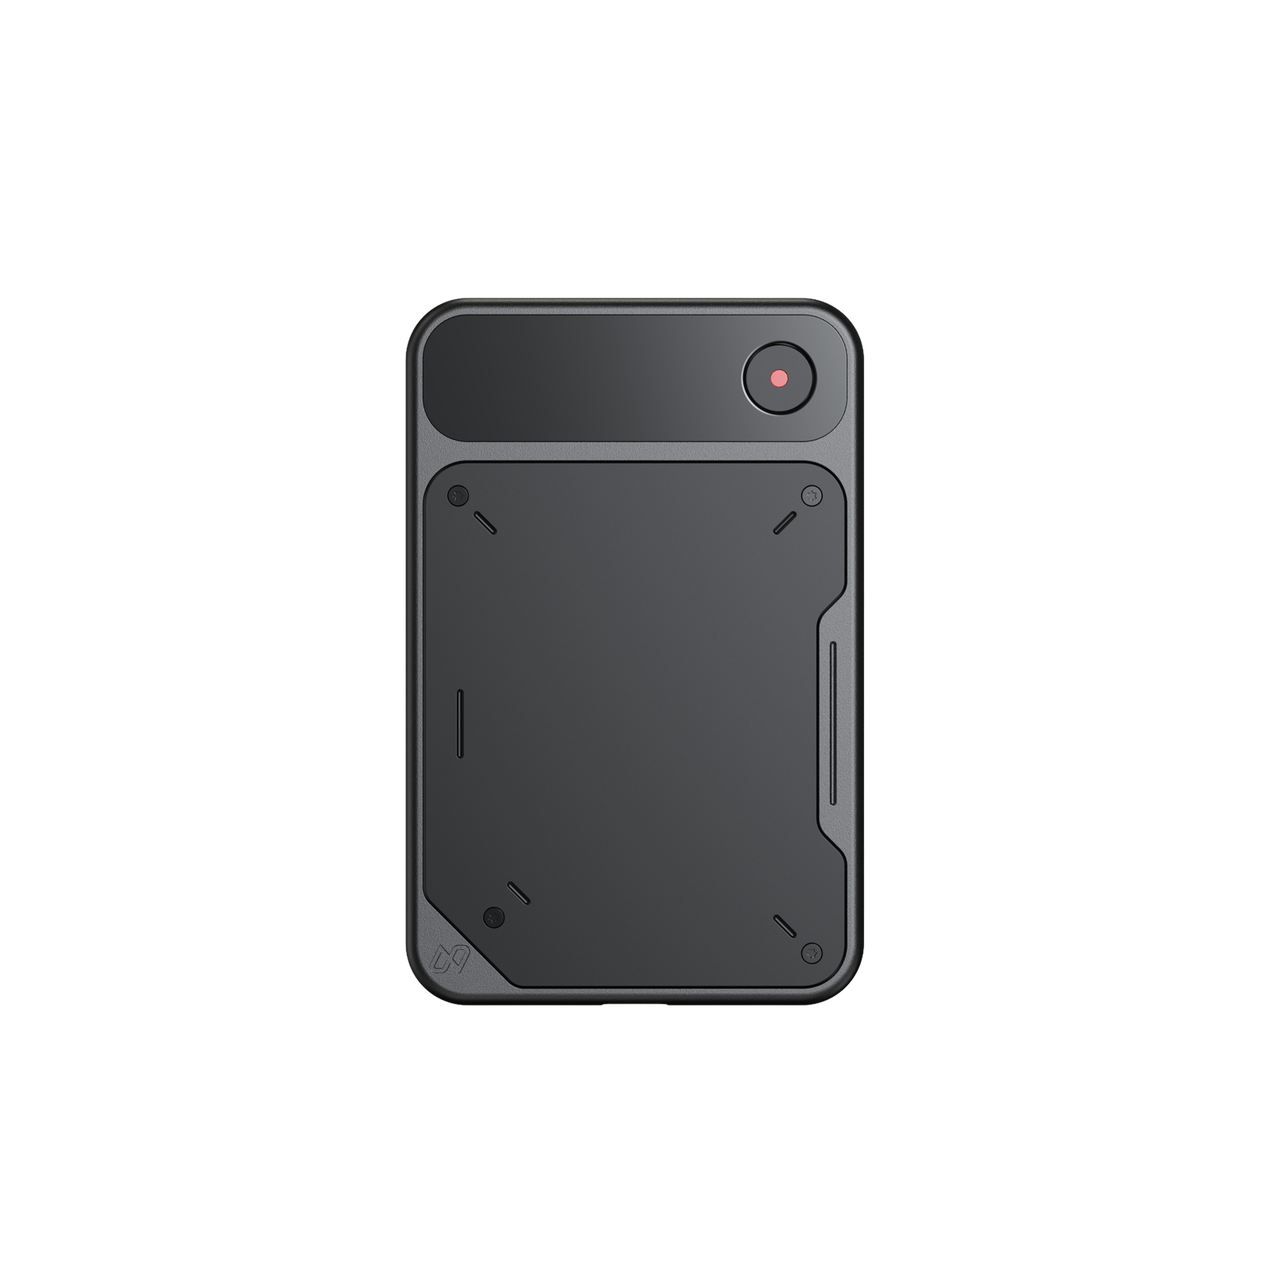
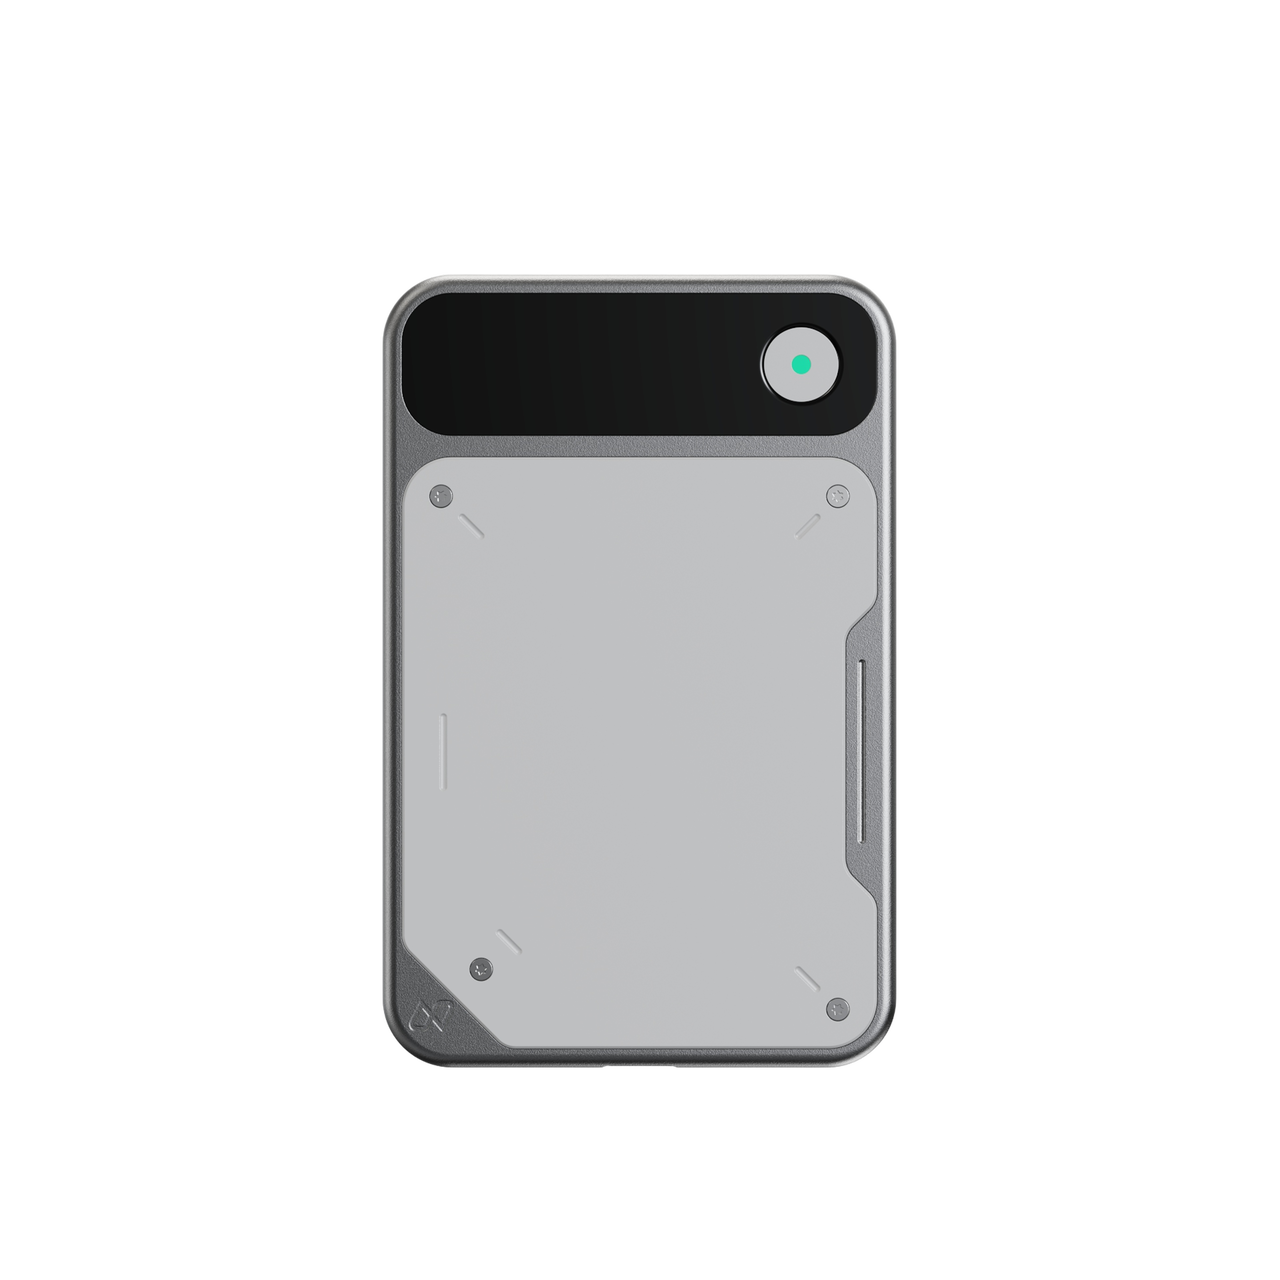
N1 Pro Notetaker is a portable AI recording card that works with the Notari app. Capture meetings, interviews, classes, ideas, and phone calls whenever you need.
One-button recording: Start recording with the device button, without opening the app.
Phone call recording: Save important calls in full.
Clear audio: Capture sound reliably for more accurate transcription.
Offline recording: Record without a phone or internet connection. Recordings stay on the device and automatically sync and upload when you reconnect to the app with internet access.


2. Sign Up and Pair Your Device
Create an Account
Step 1: Choose a Registration Method
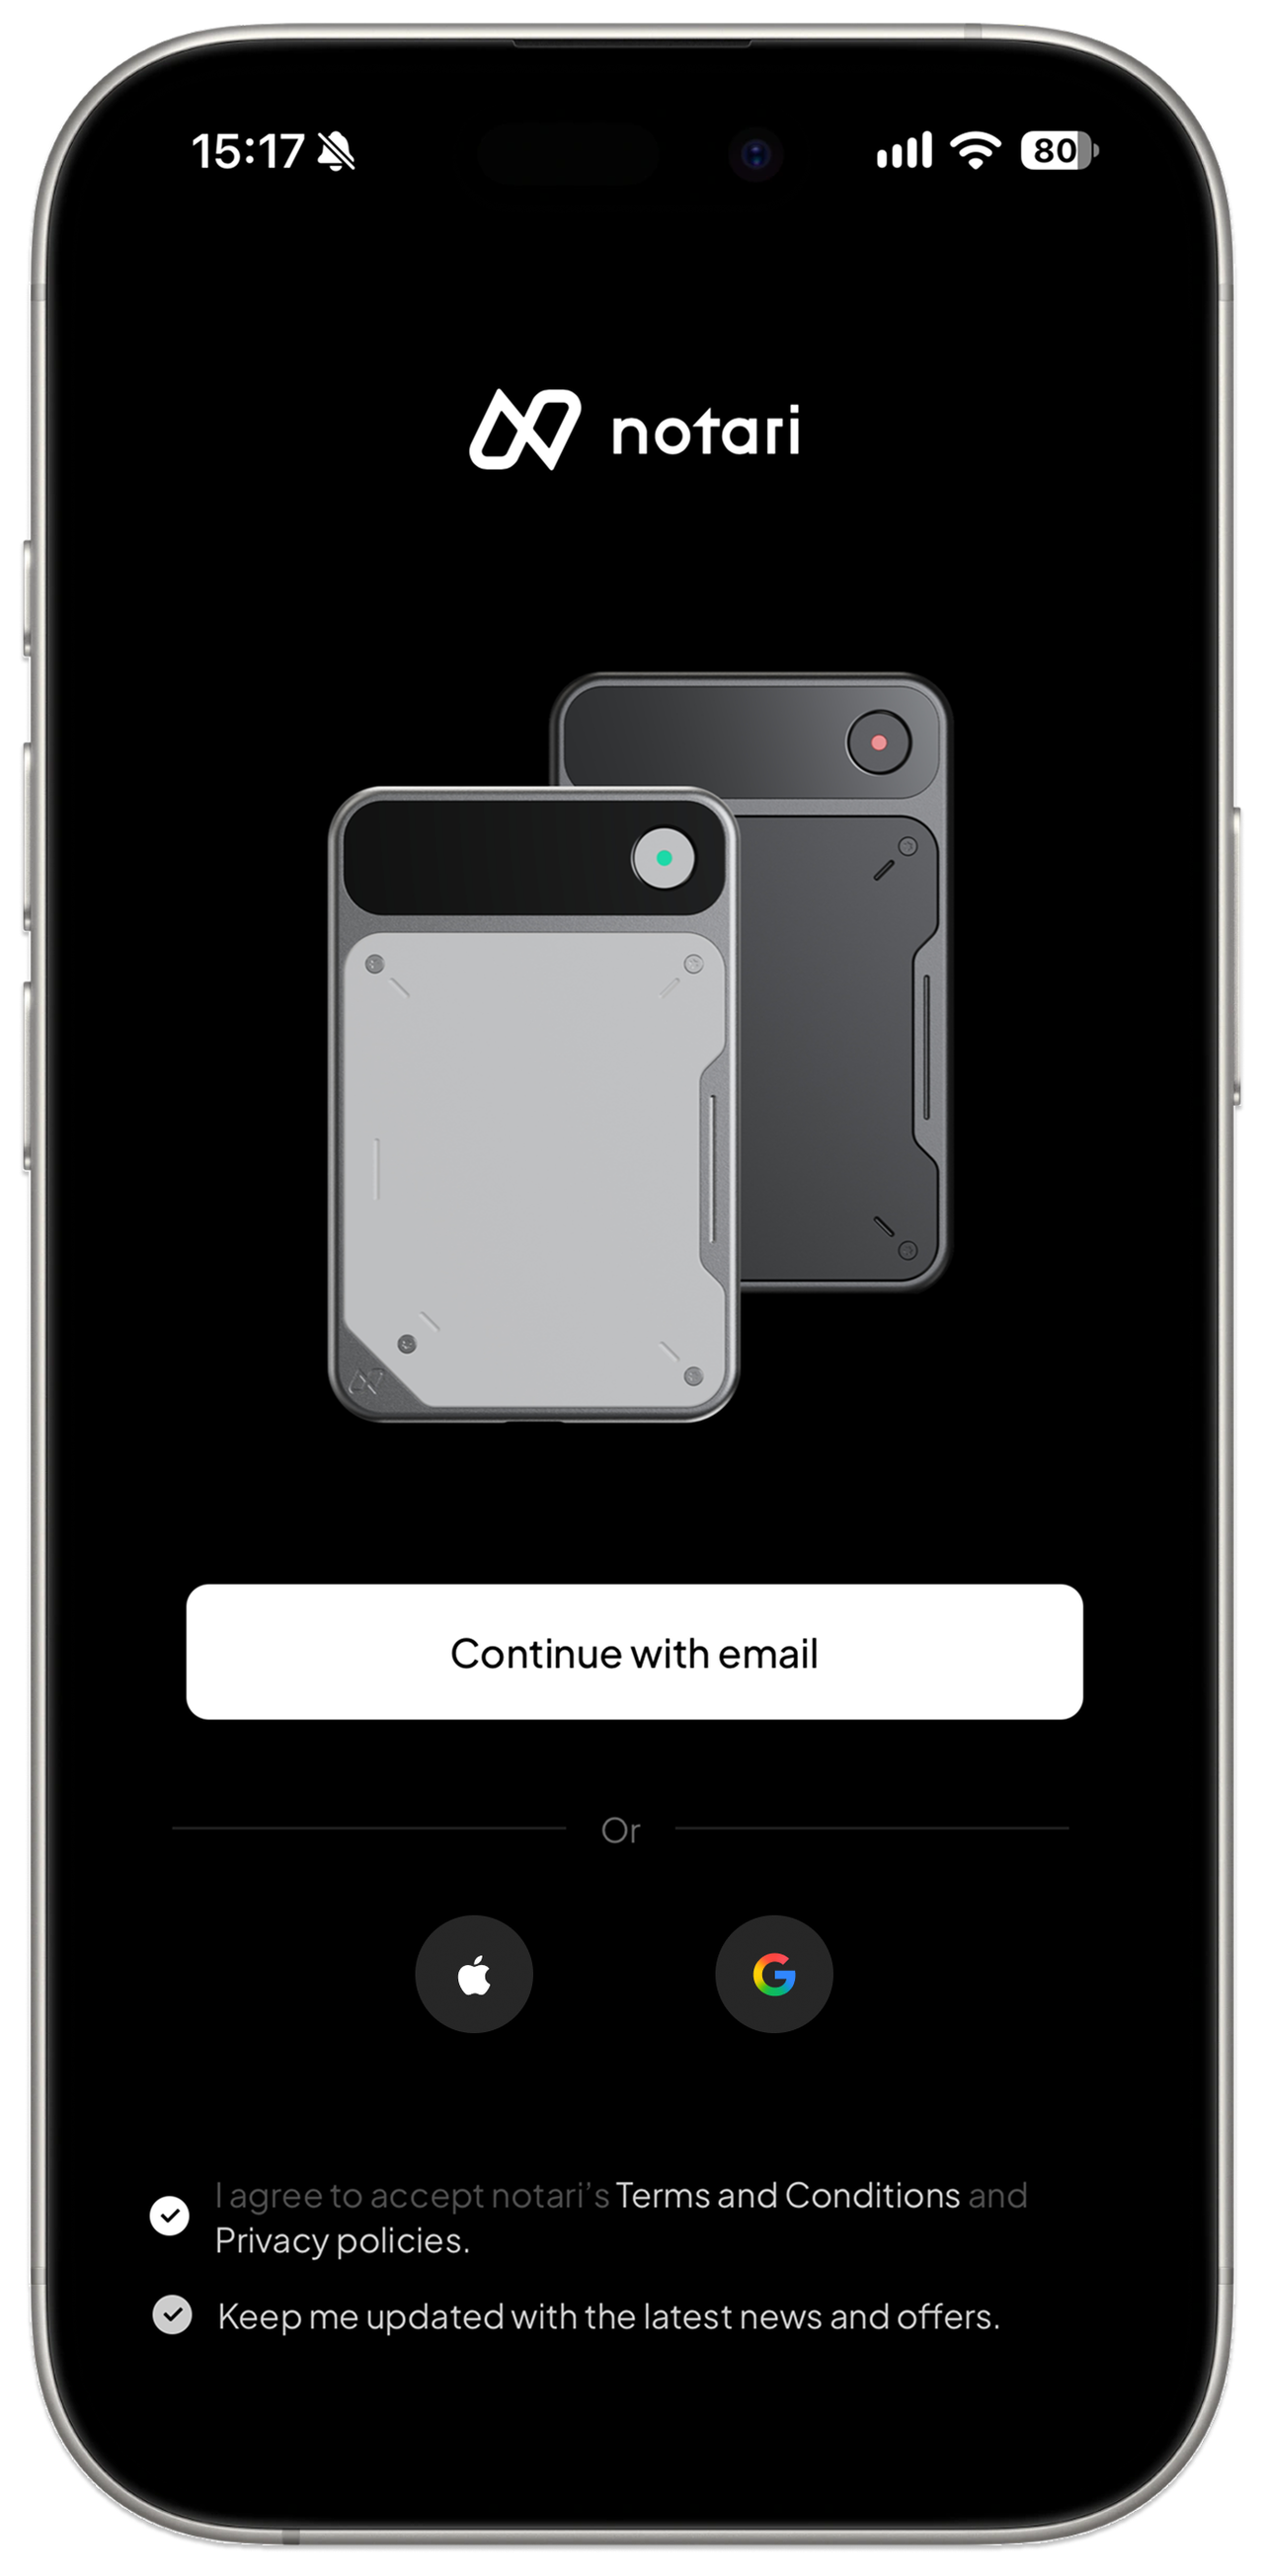
Read and agree to the Terms and Conditions and Privacy Policy, then continue with your email, Apple account, or Google account.
Step 2: Register with Email
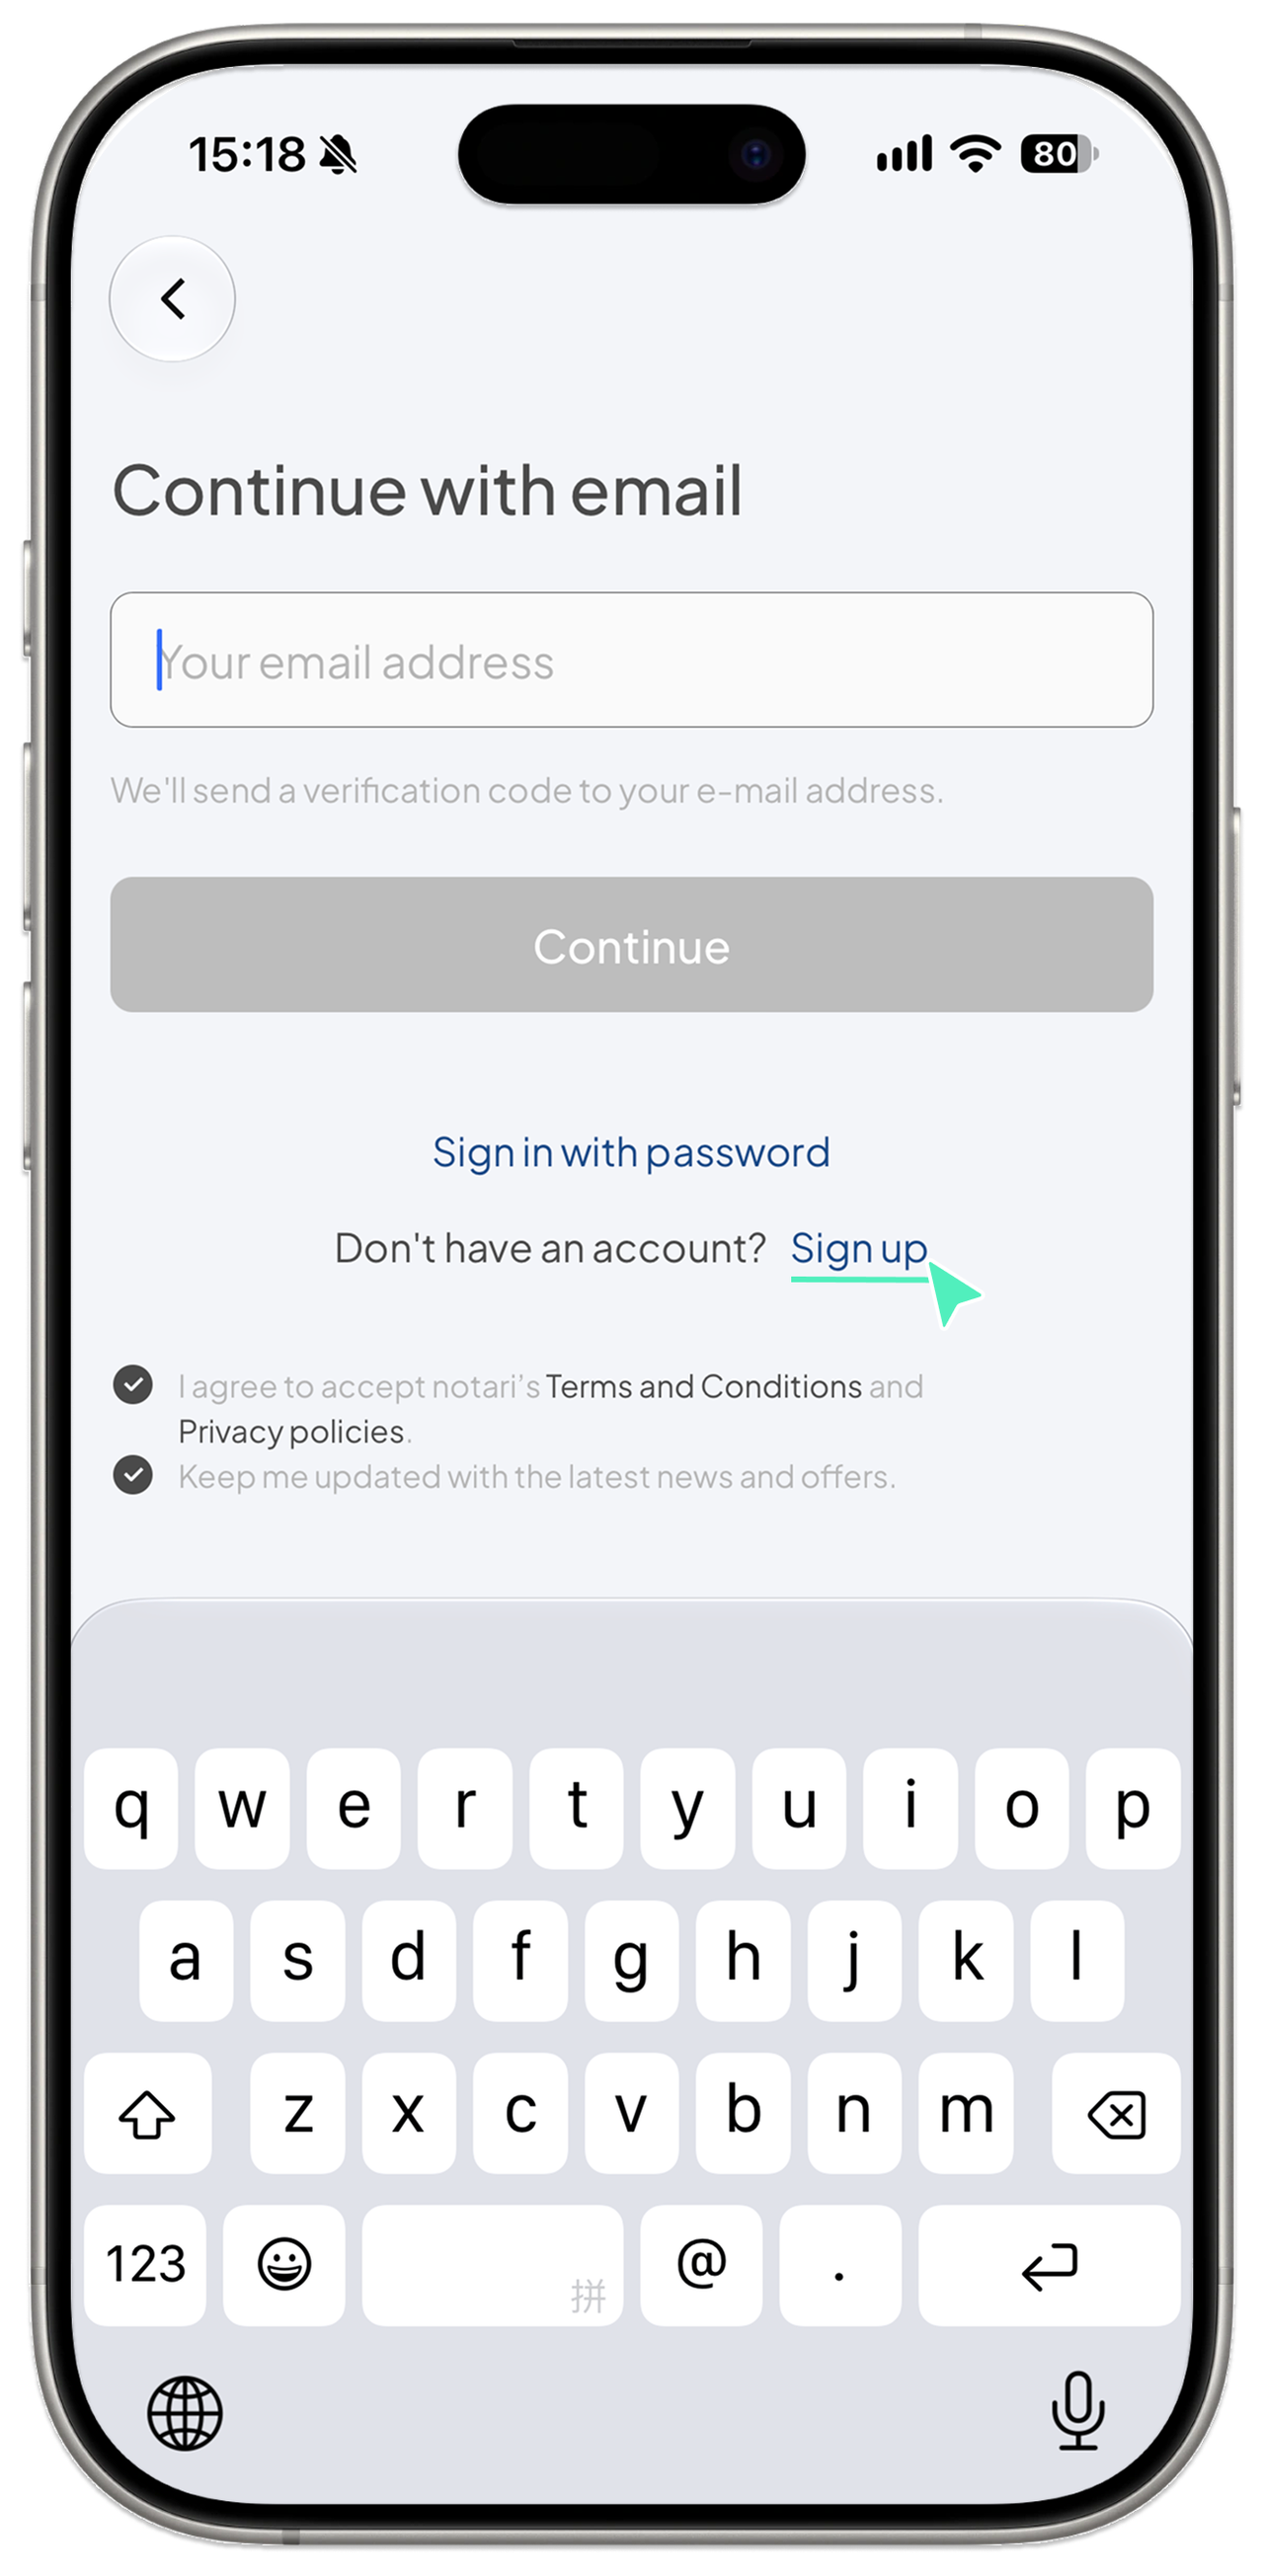
Tap Continue with email. If this is your first time using Notari, select Sign up.
Step 3: Create Your Account and verify Your Email
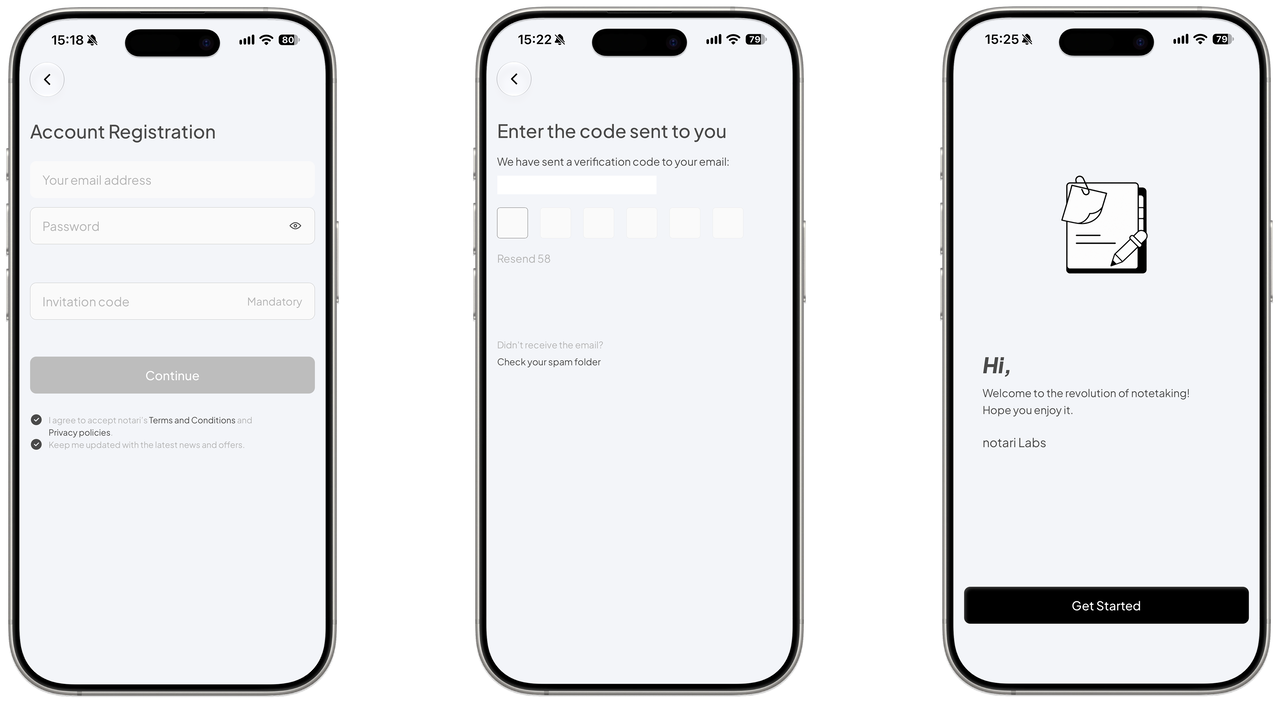
Enter your email address, create a password, and enter your invitation code. Then tap Continue.
Enter the six-digit verification code sent to your email. If you do not receive it, request a new code or check your spam folder.
Tap Get Started to begin.
Pair Your Device with the App
Step 1: Open the pairing screen
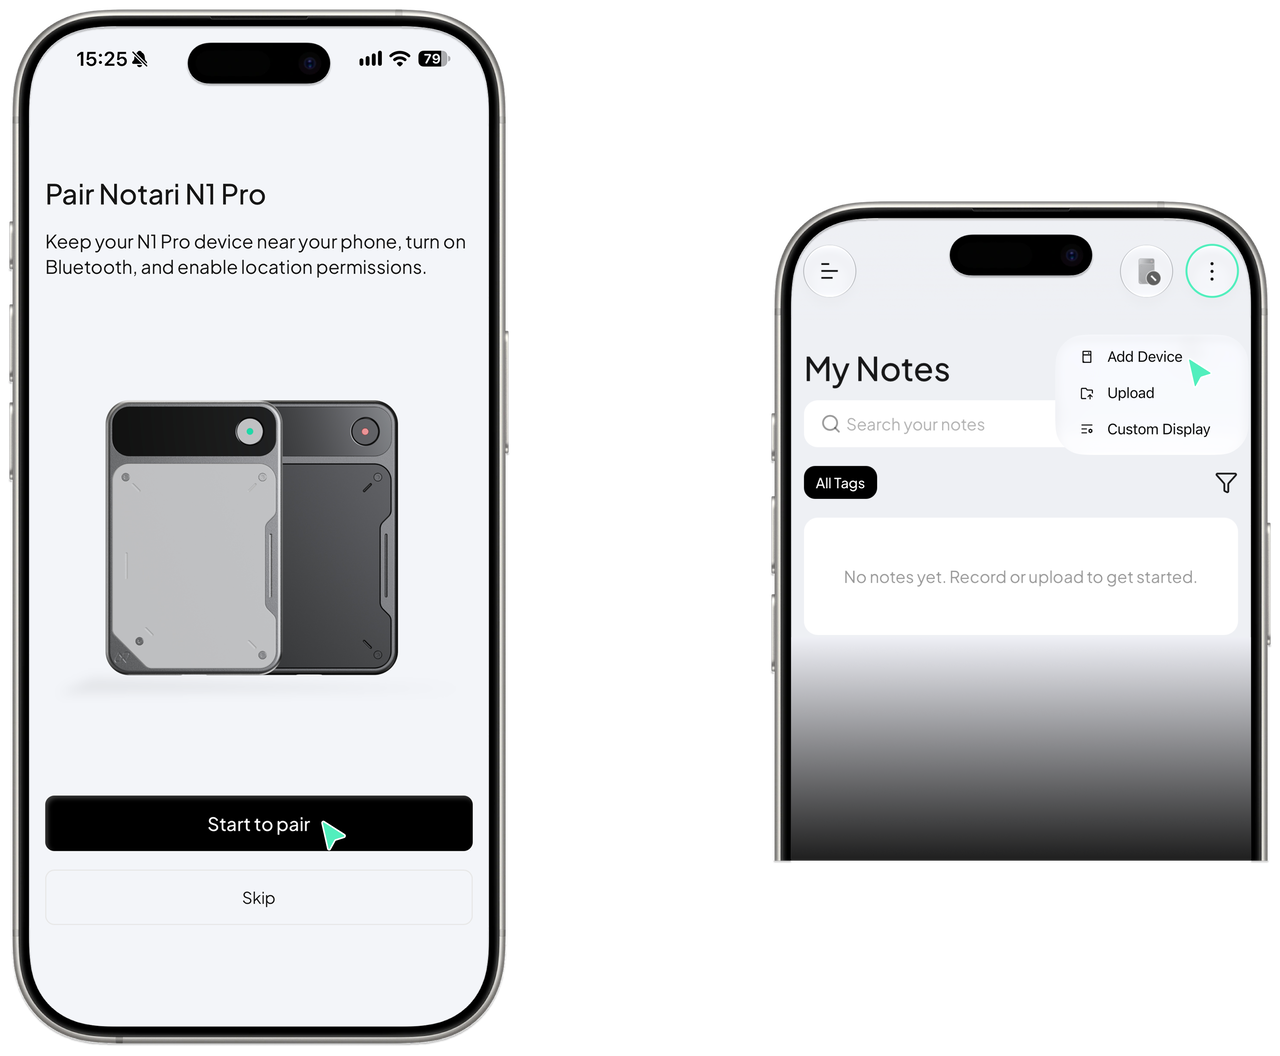
Tap Start to pair to search for your device, or Skip to pair later.
To pair later, open the menu at the top right of the app’s home screen and tap Add Device.
Step 2: Turn on your recorder
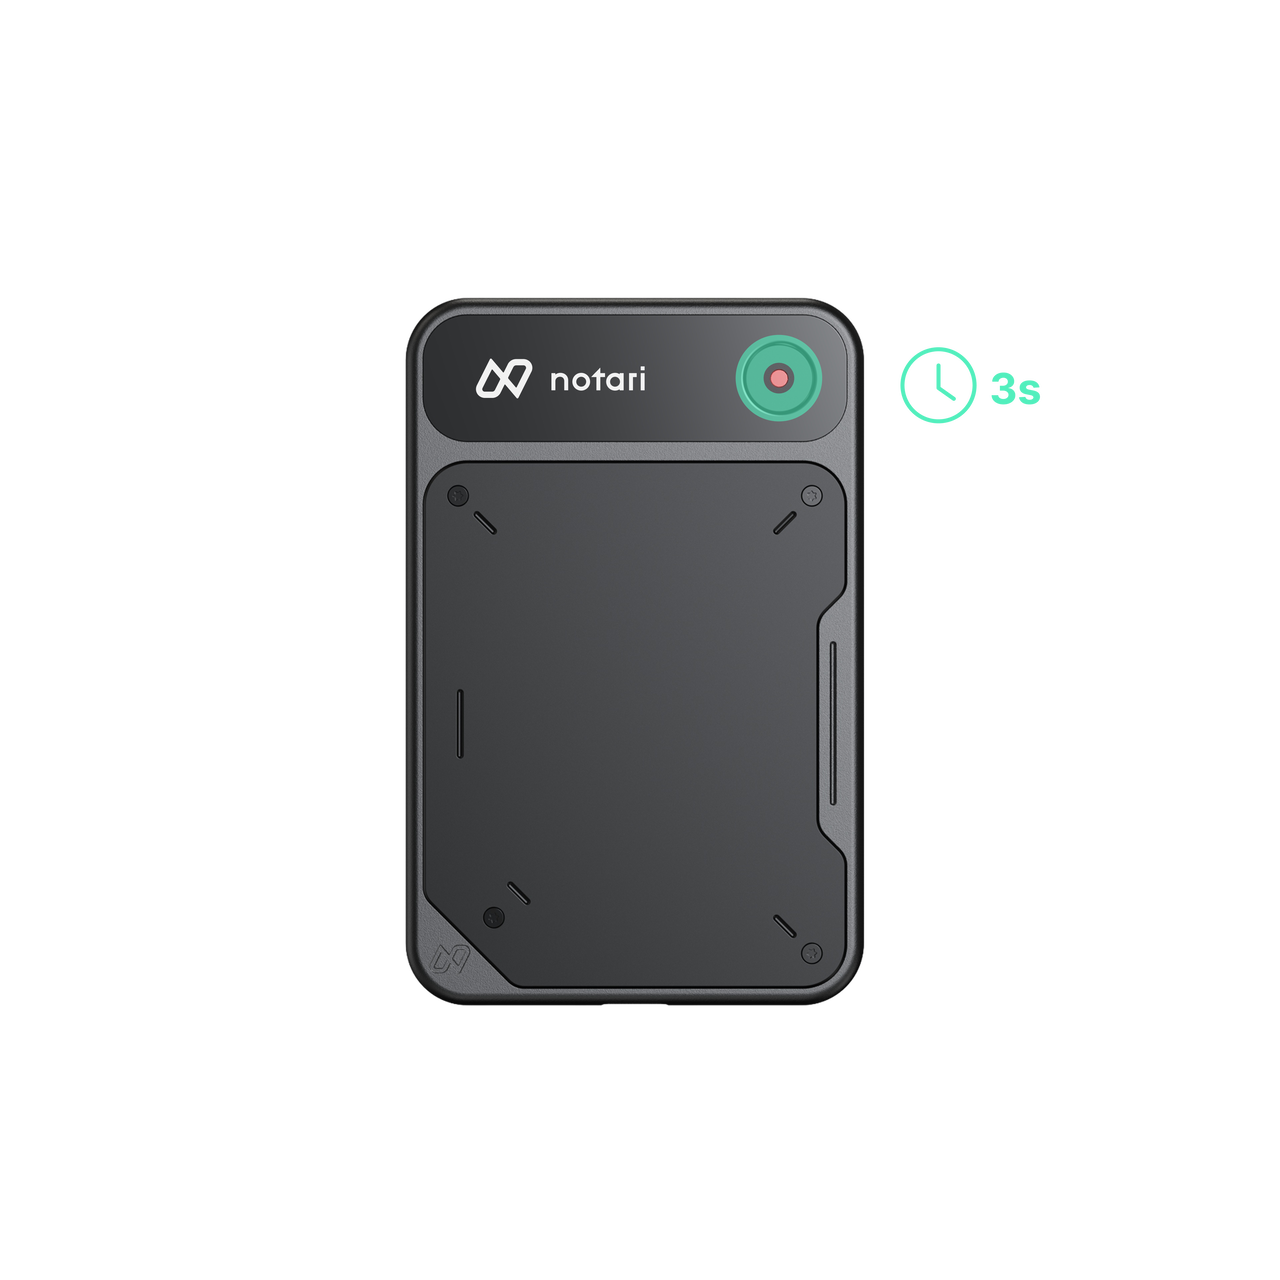
Place N1 Pro near your phone. Press and hold the device button for 3 seconds to turn it on.
Step 3: Find your device
The app automatically searches for nearby Notari recorders. Find yours, check its name or serial number (SN), and tap Add.
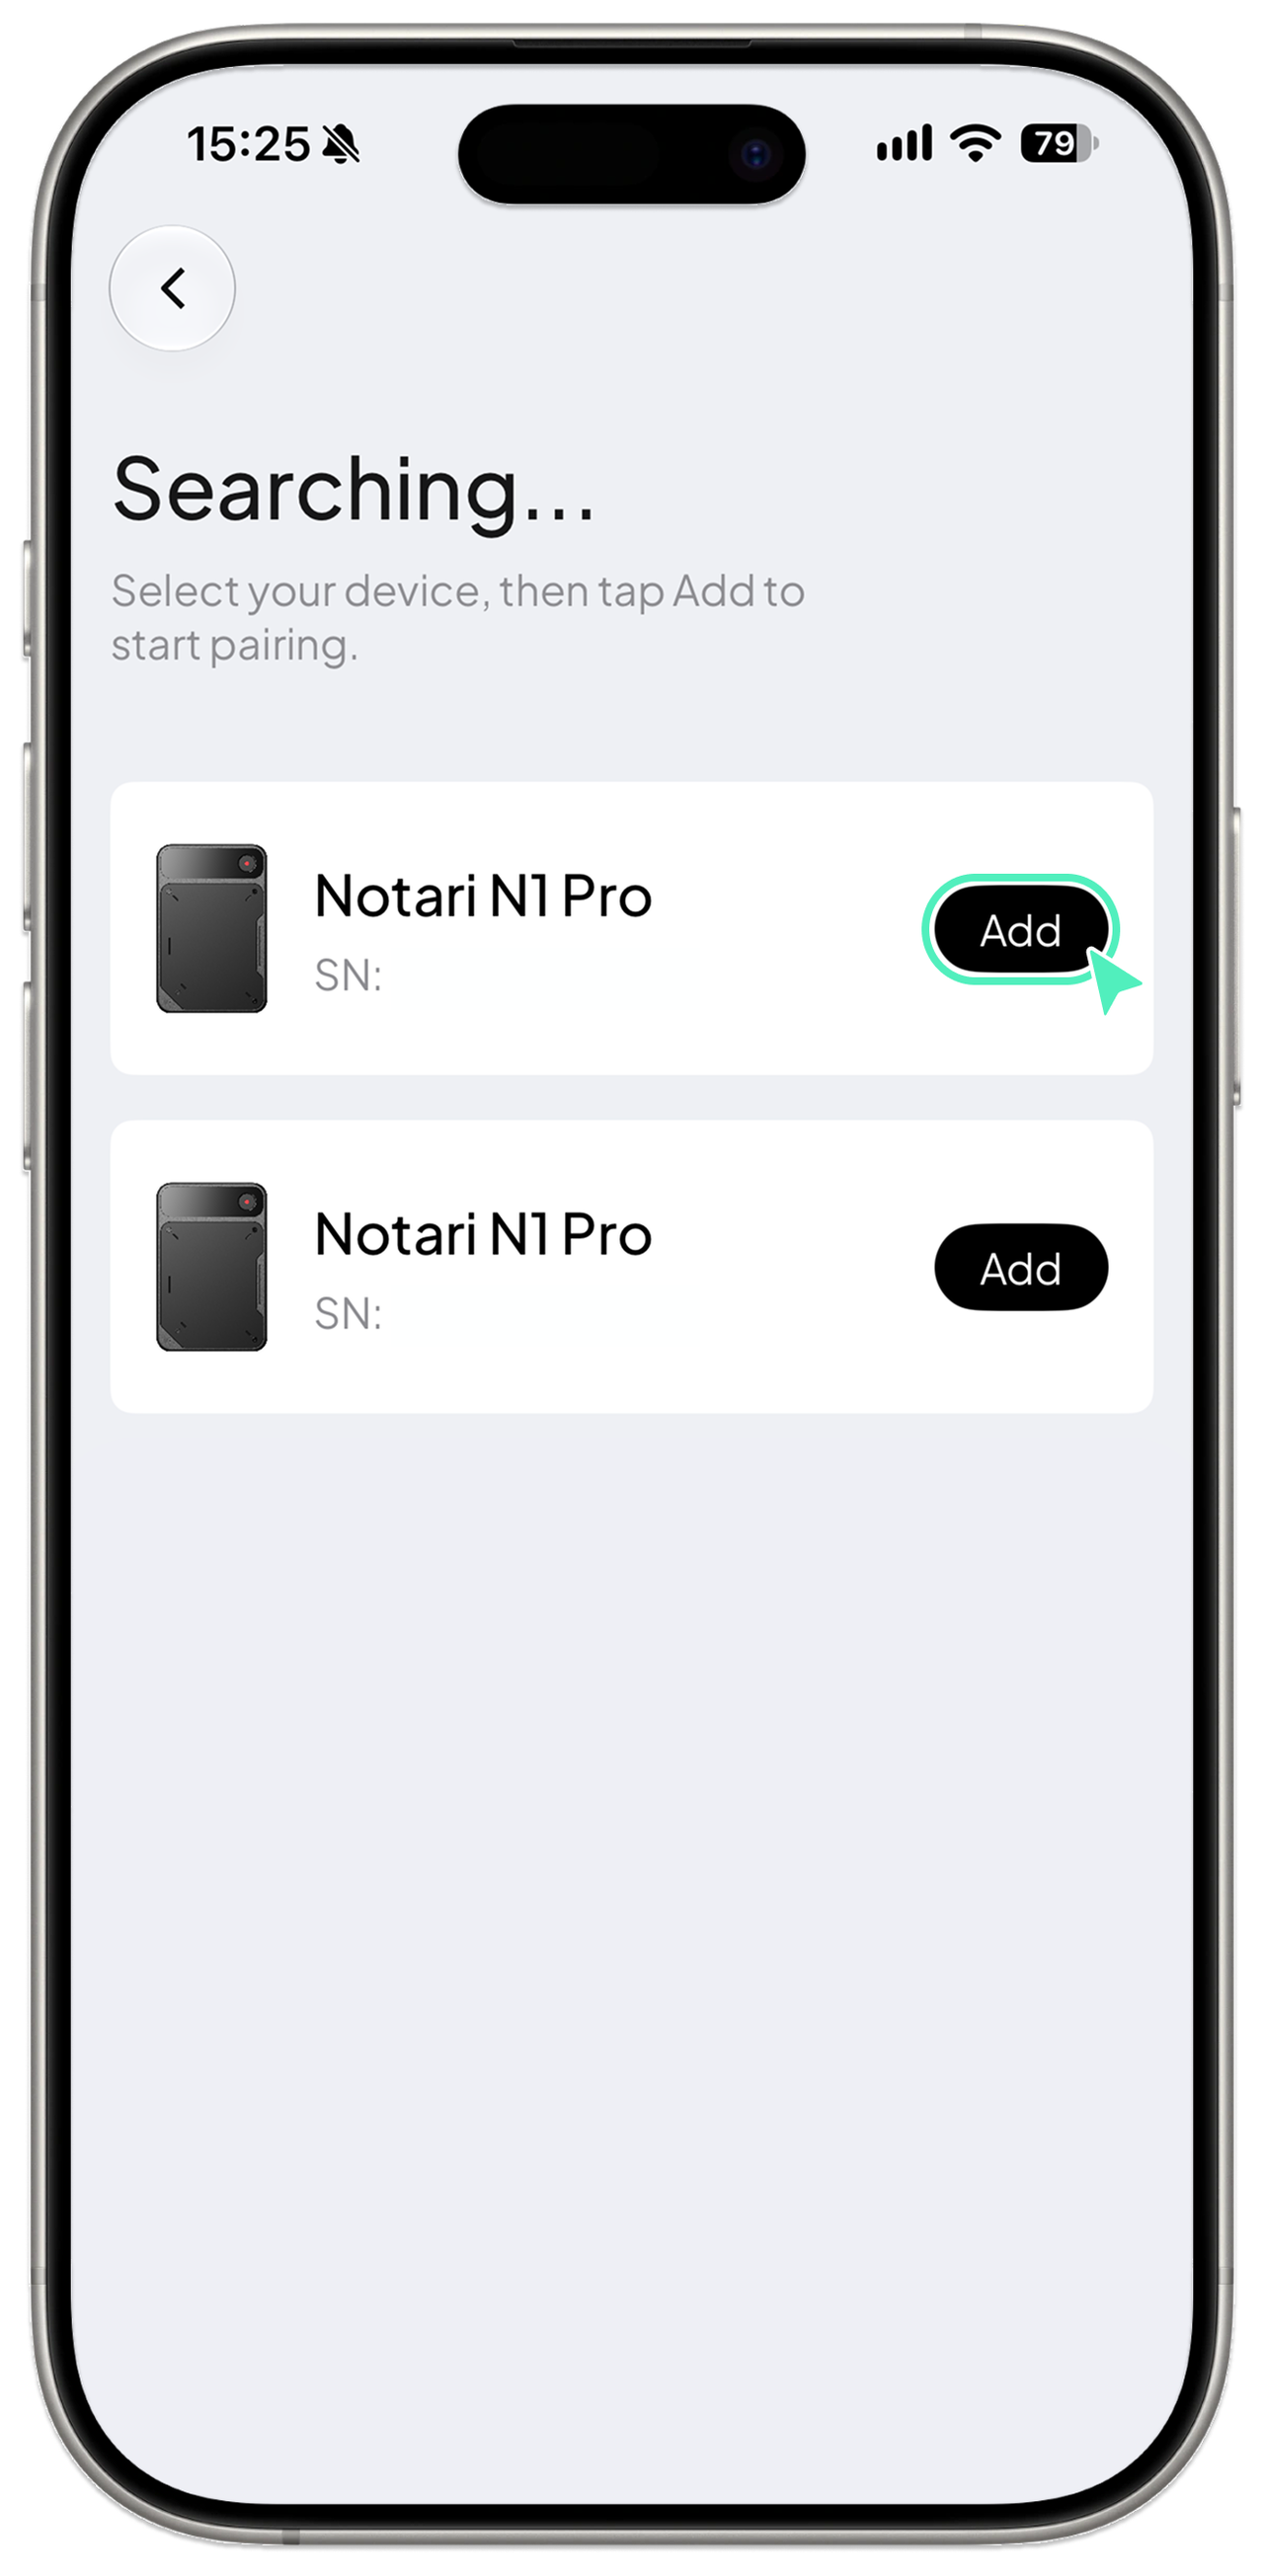
Step 4: Confirm pairing
When prompted, double-press the device button to confirm. Pairing is complete.
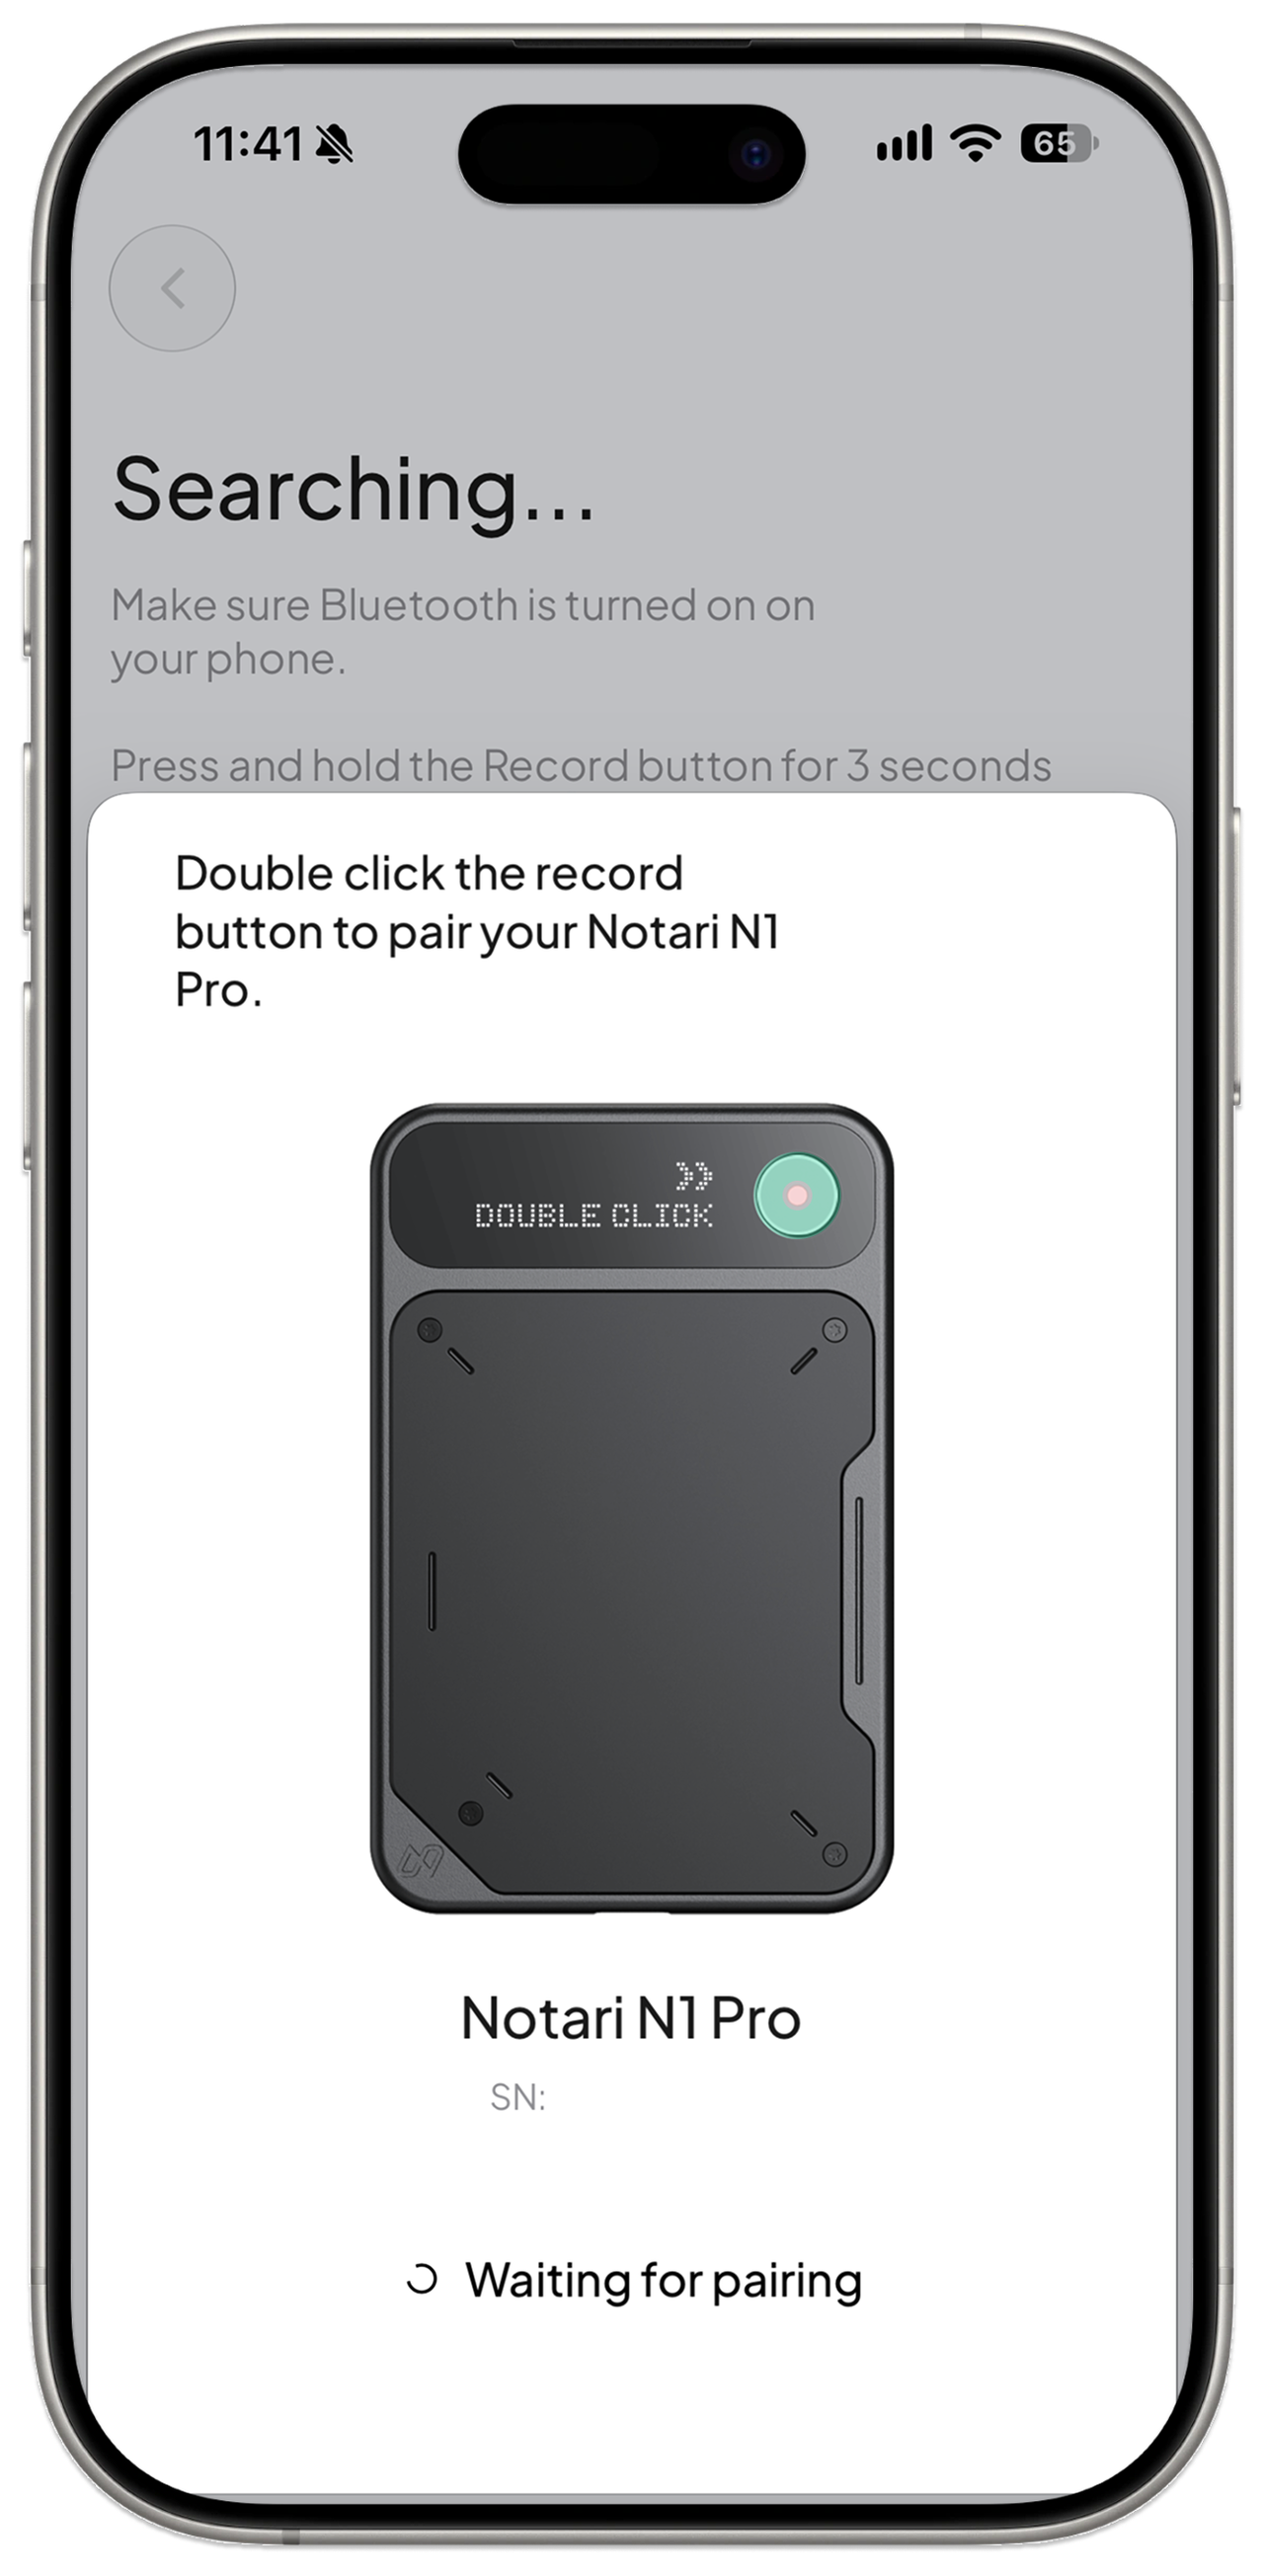
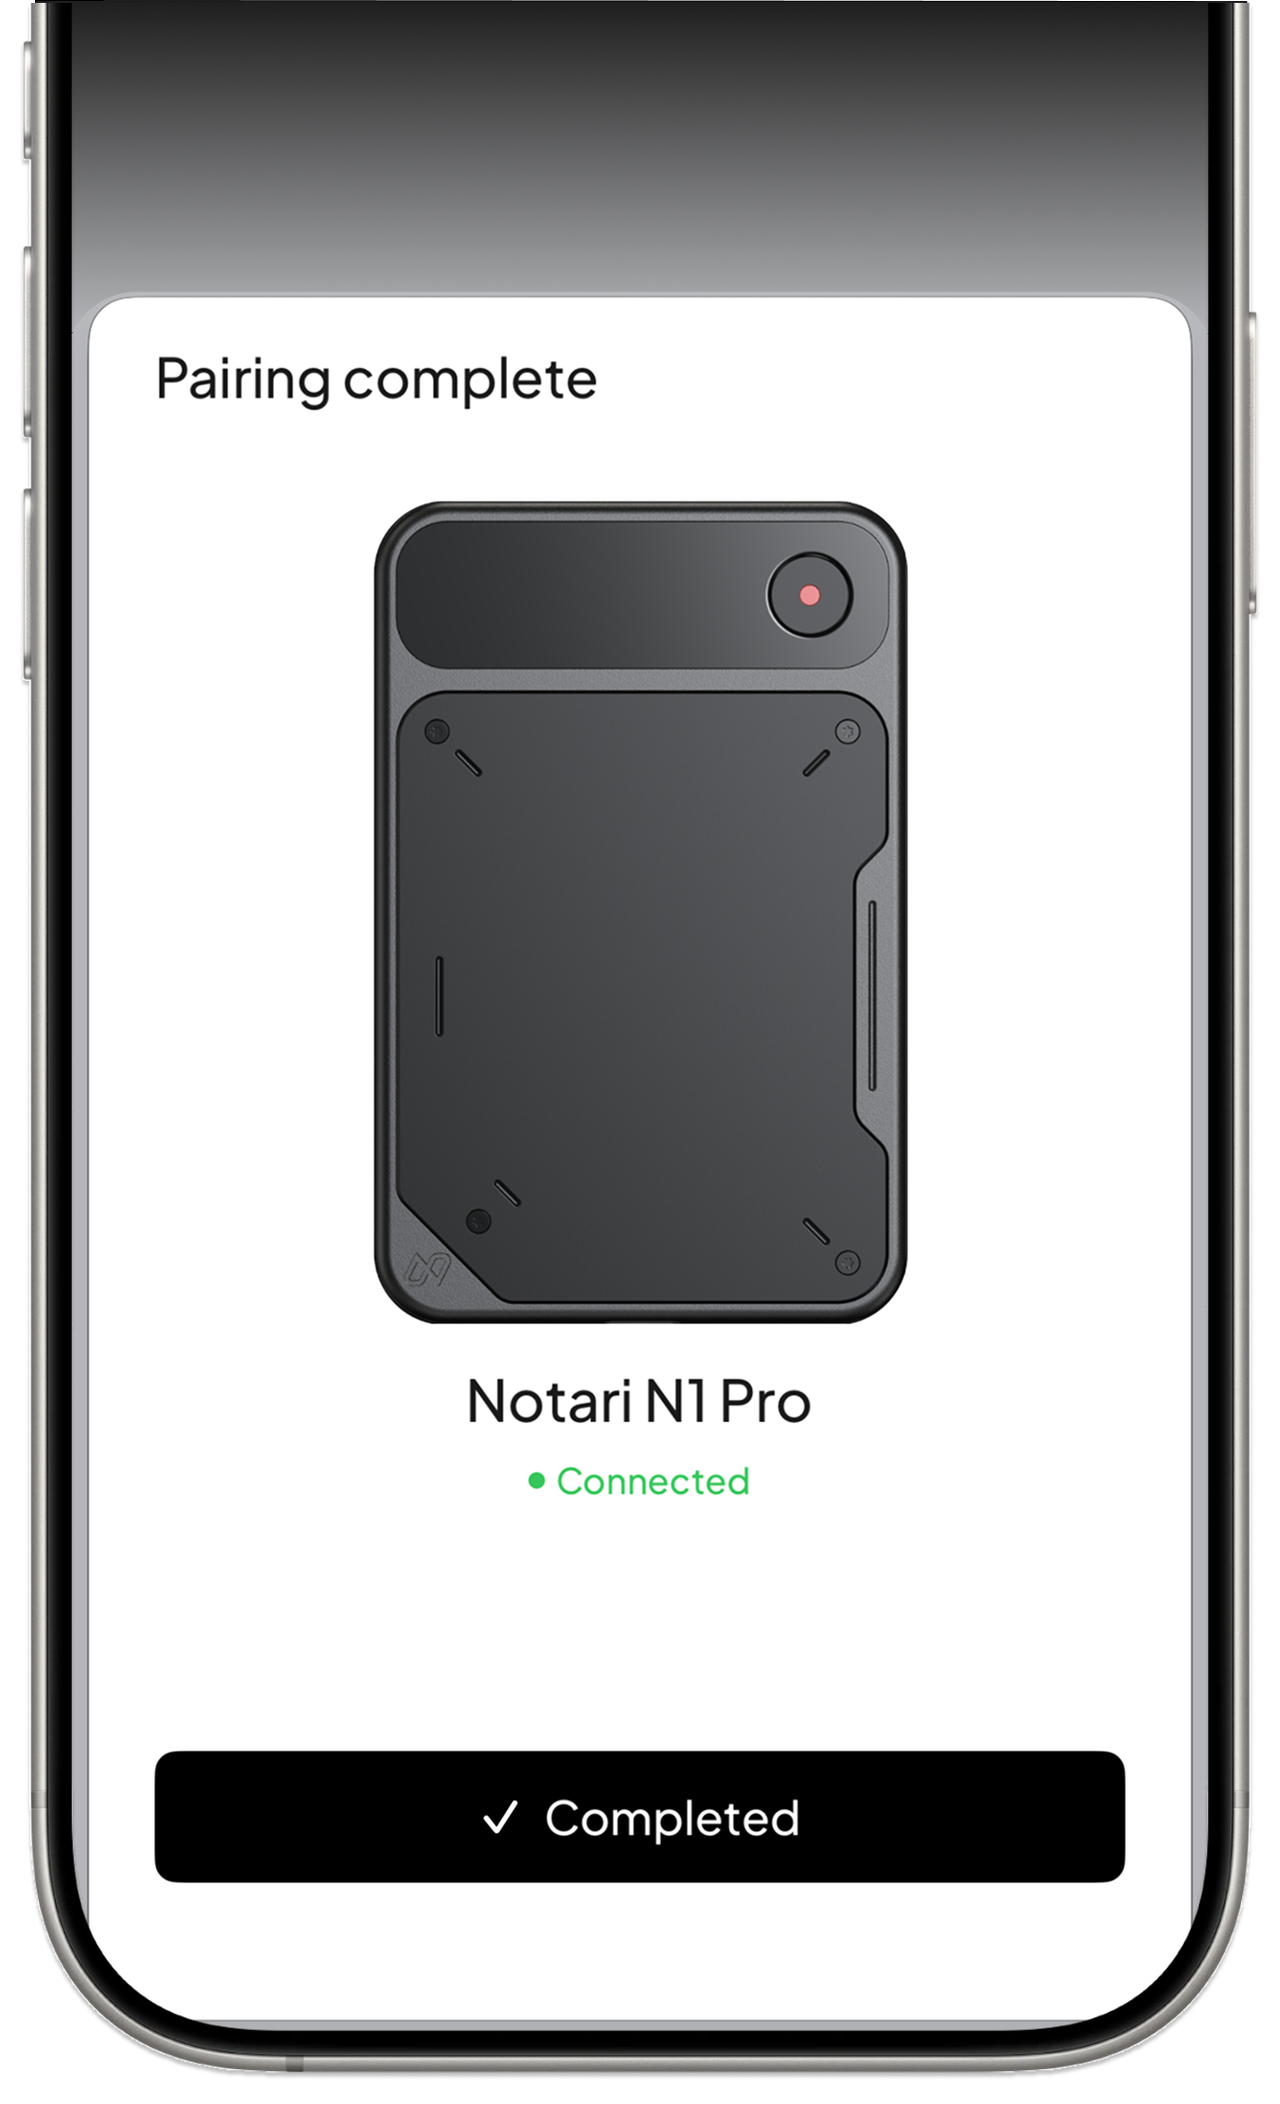
Step 5: Open device settings
After pairing, tap the device icon at the top right of the app’s home screen to view device information and adjust settings.
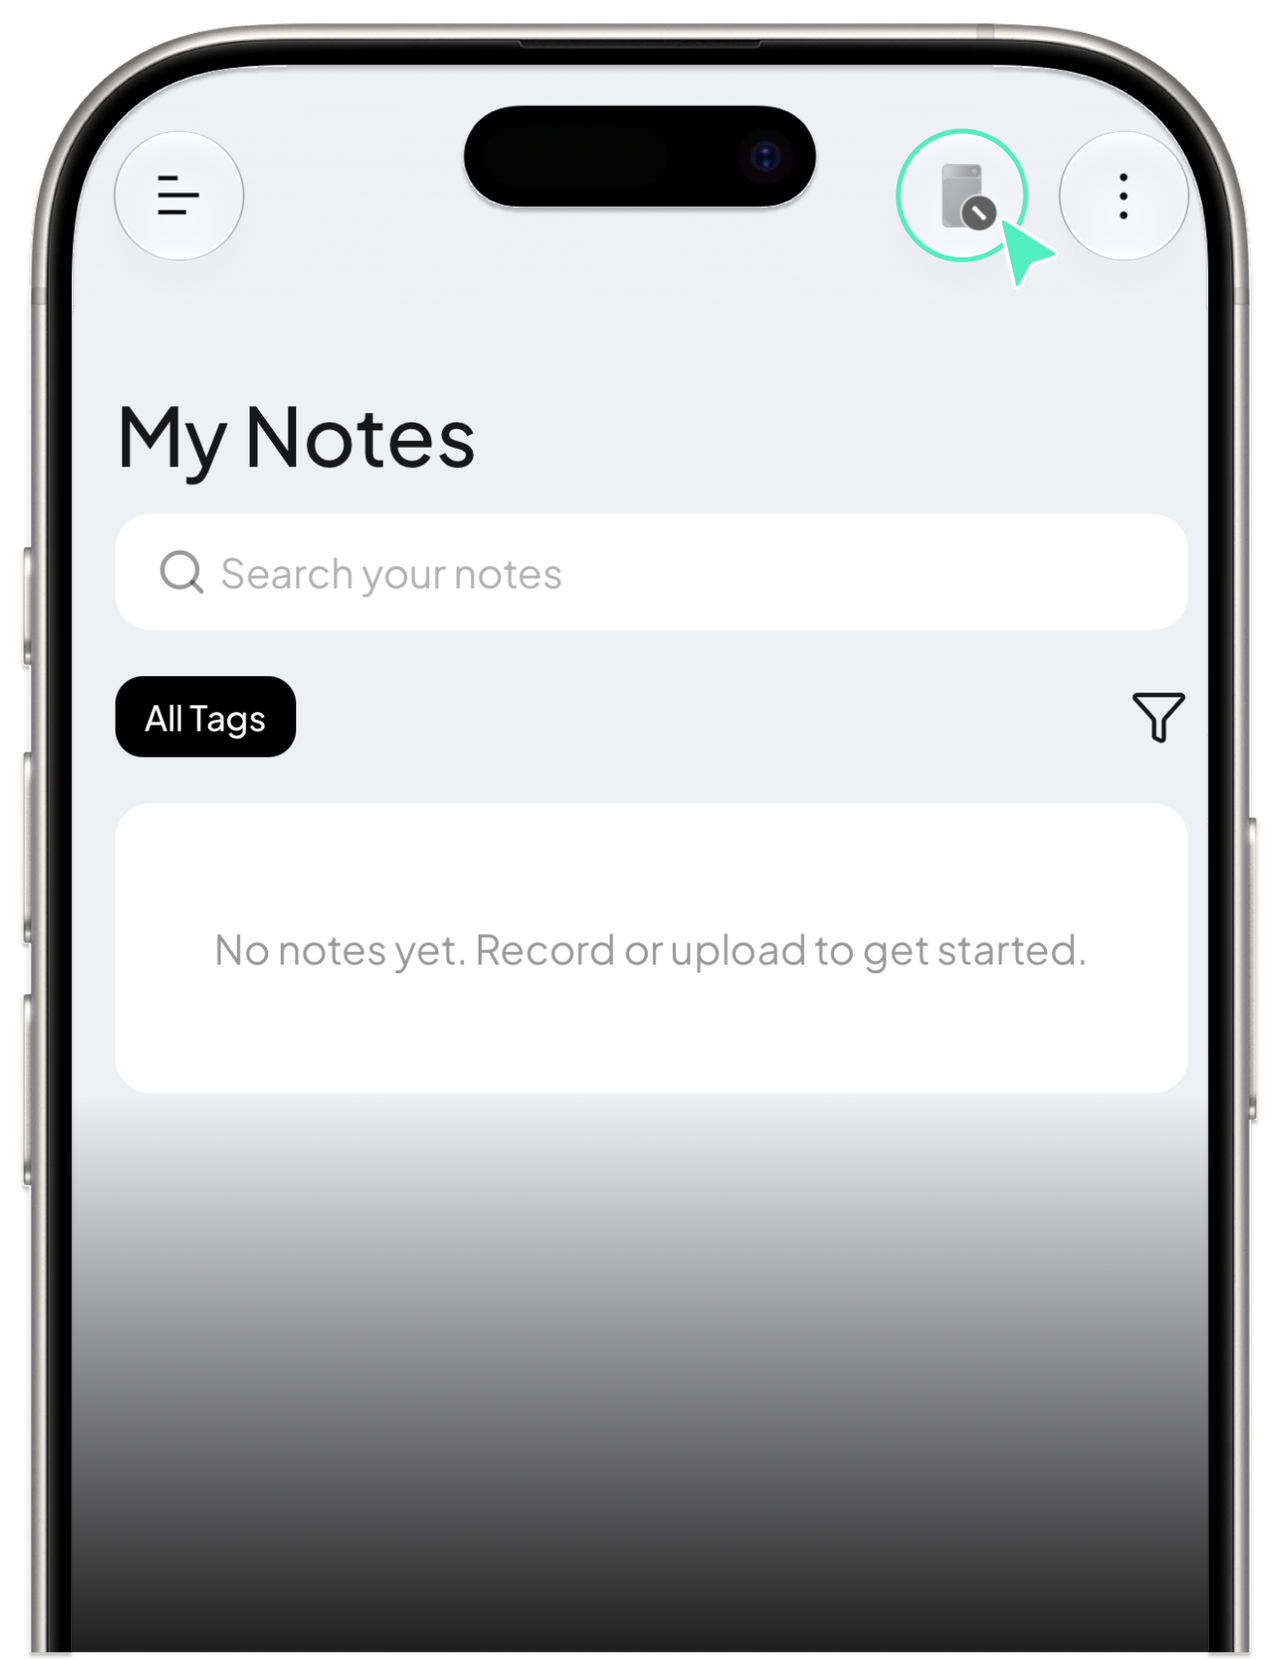
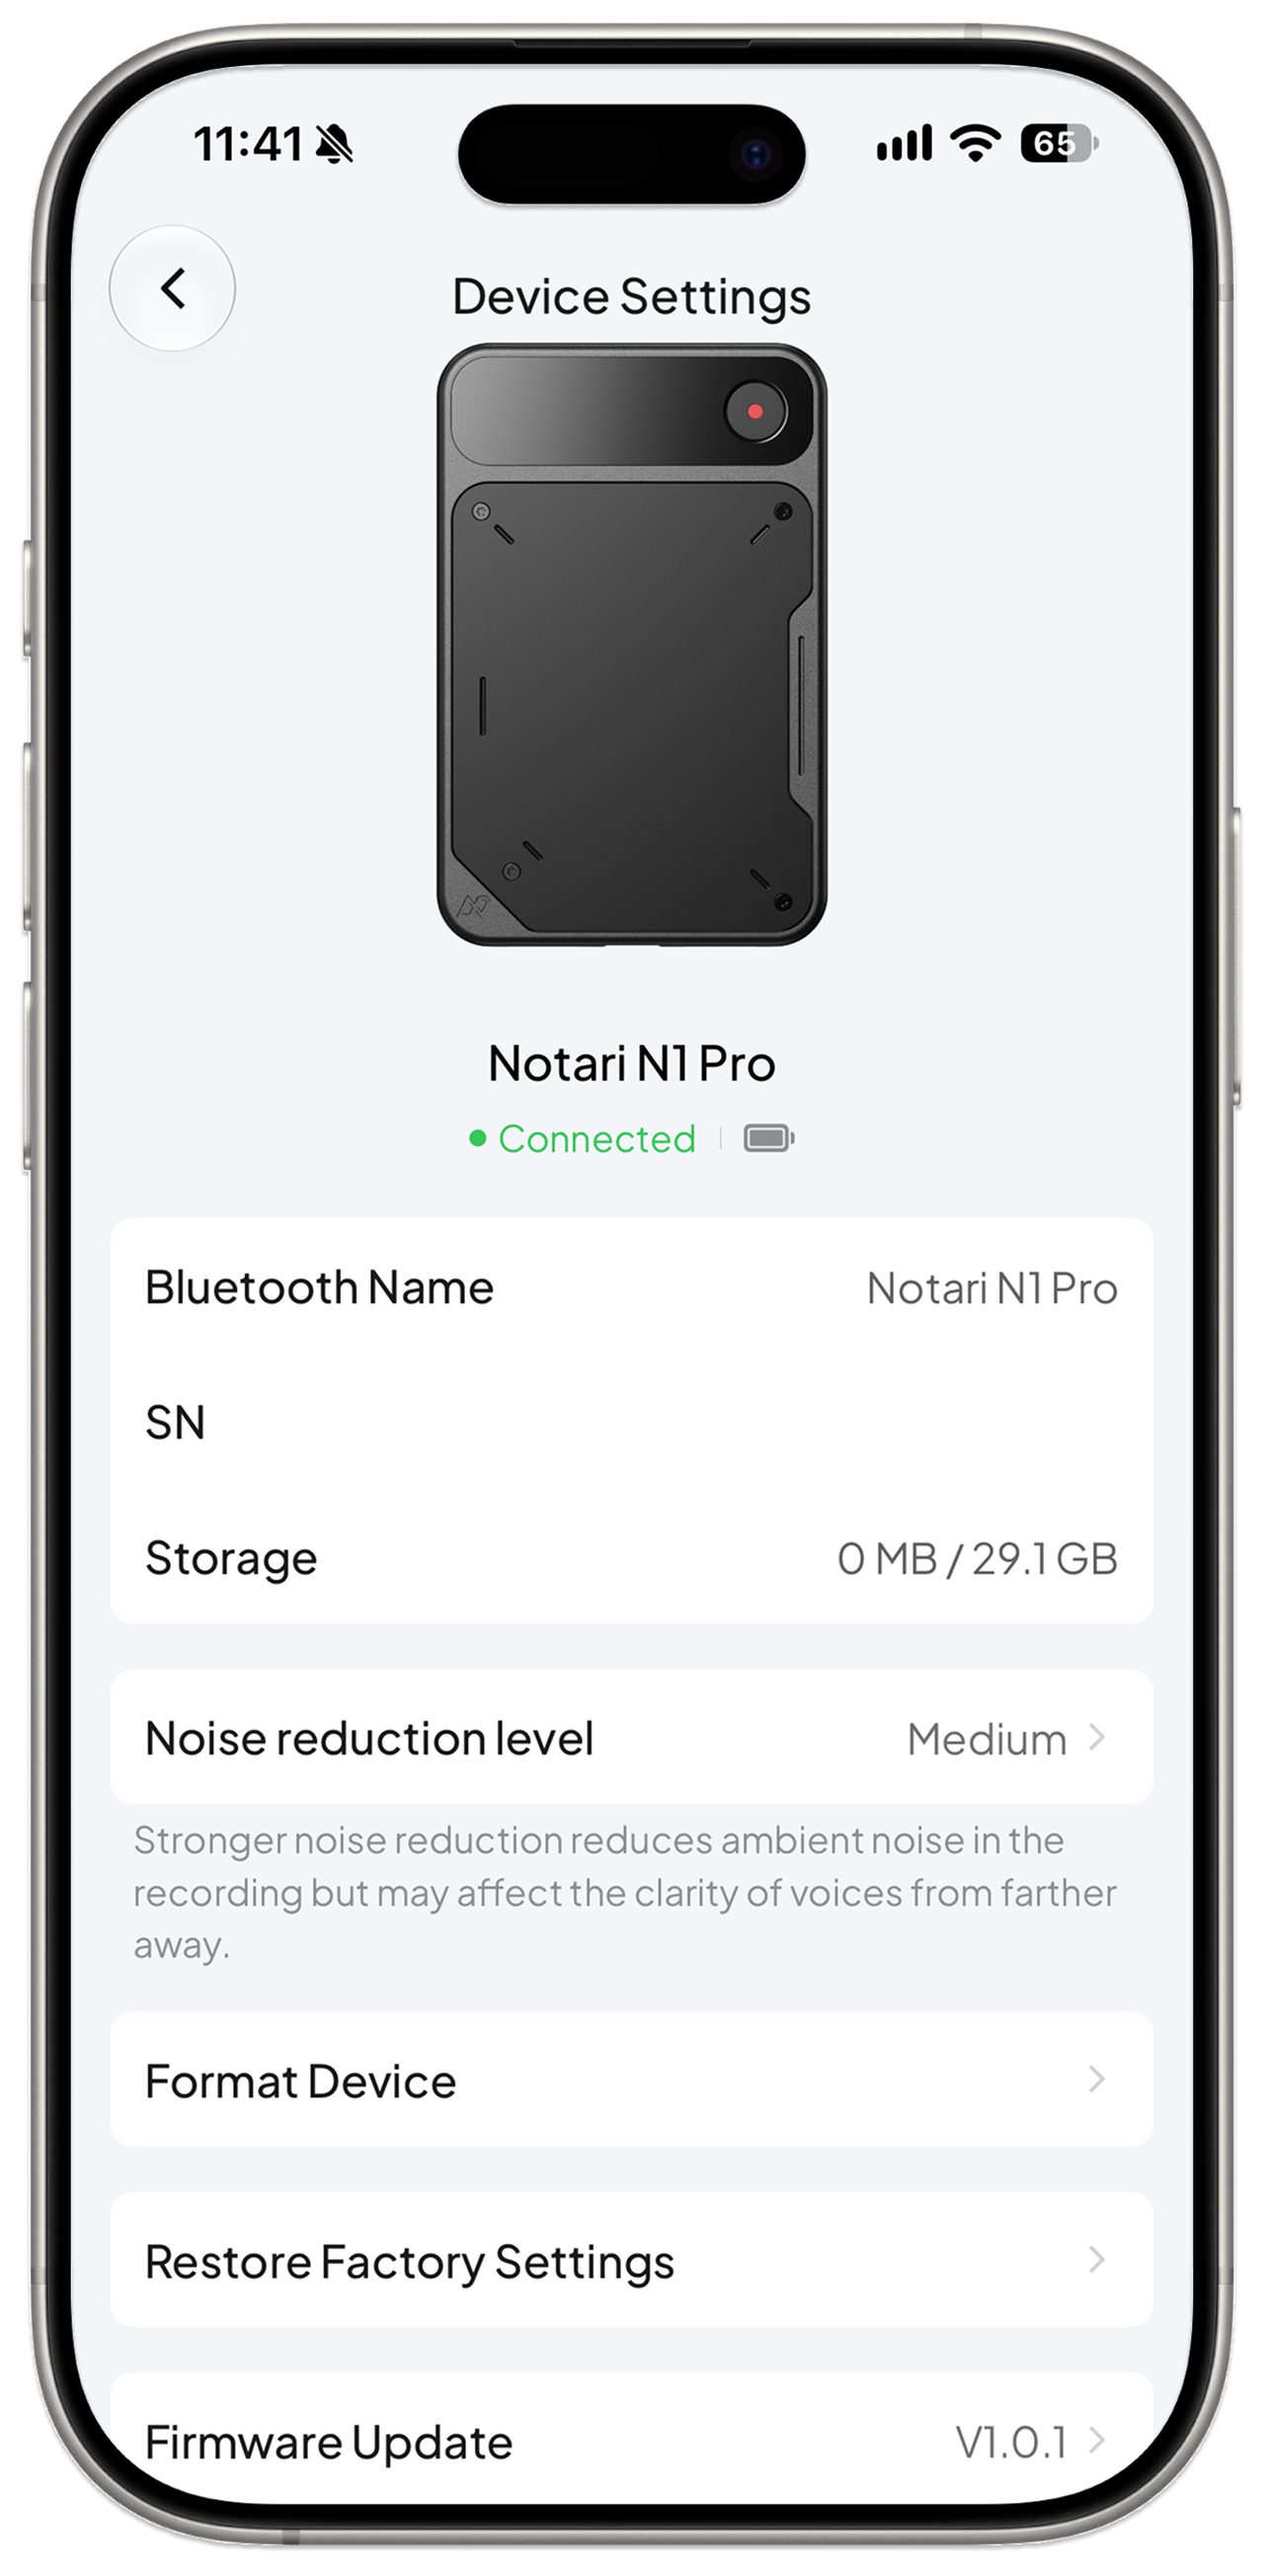
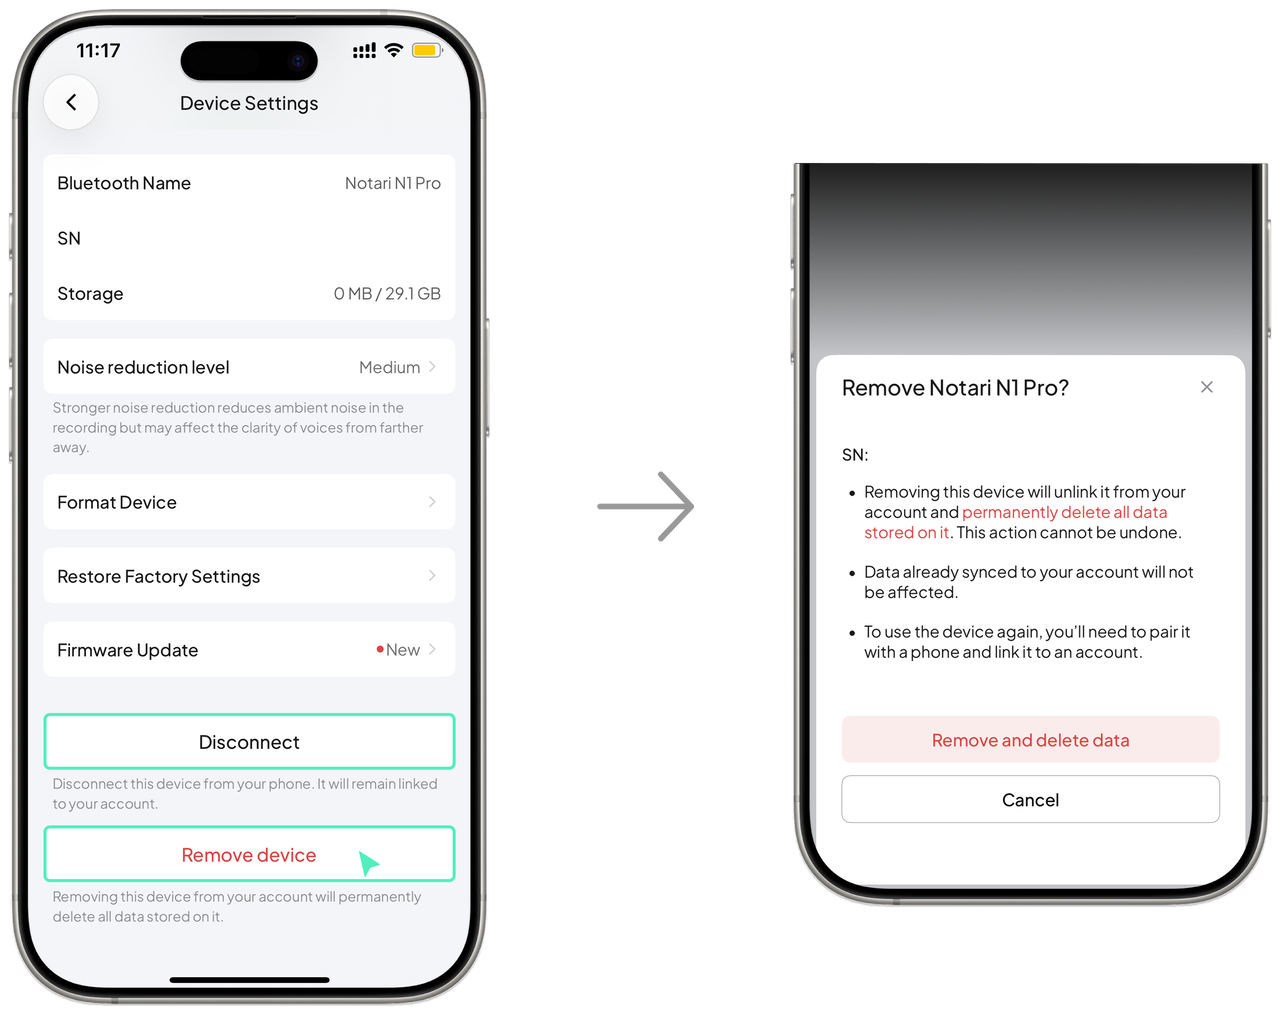
At the bottom of the settings page, tap Disconnect to disconnect, or Remove device to permanently remove it from your account.
Can’t find your recorder?
Check that:
The recorder is powered on.
Your phone’s Bluetooth is on.
The recorder is close to your phone.
The recorder isn’t connected to another phone or account.
3. Record with N1 Pro Notetaker
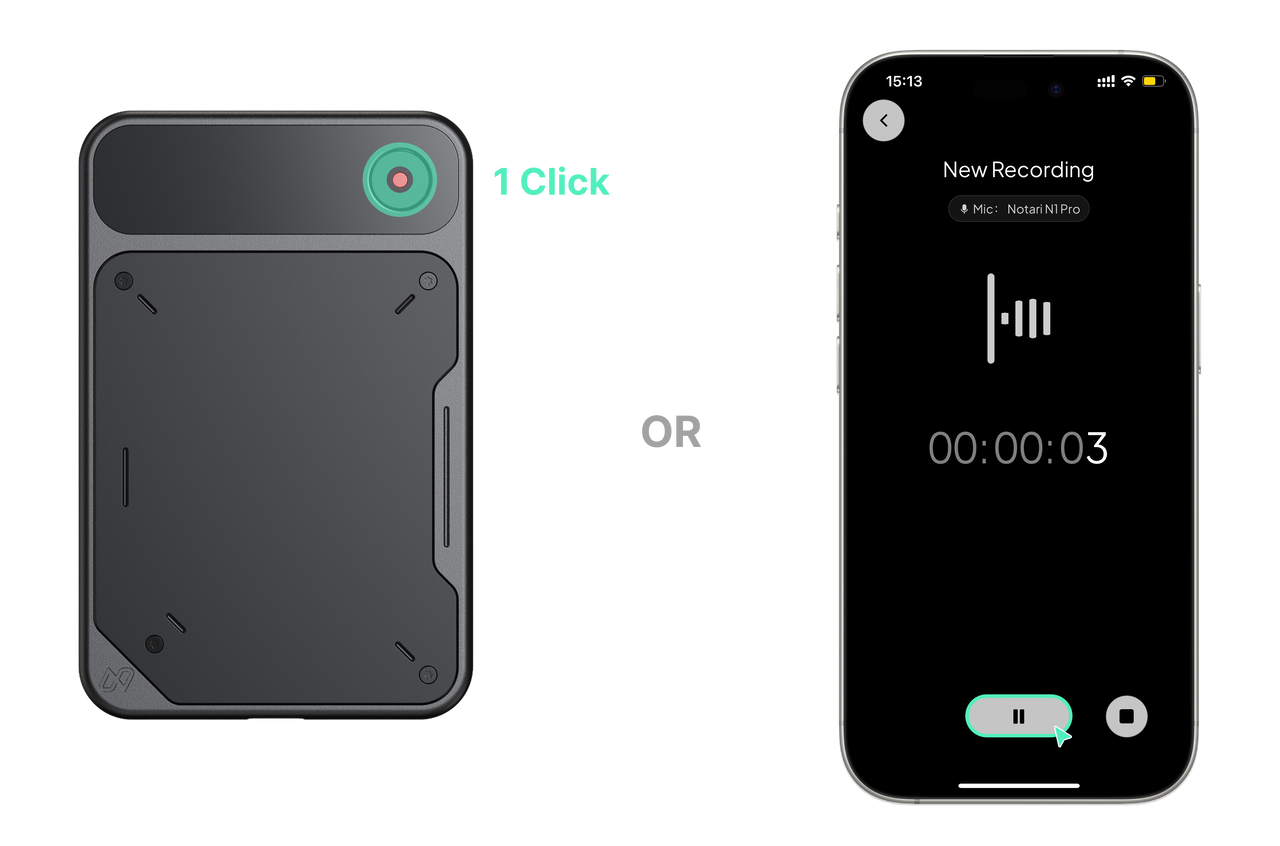
Step 1: Start Recording
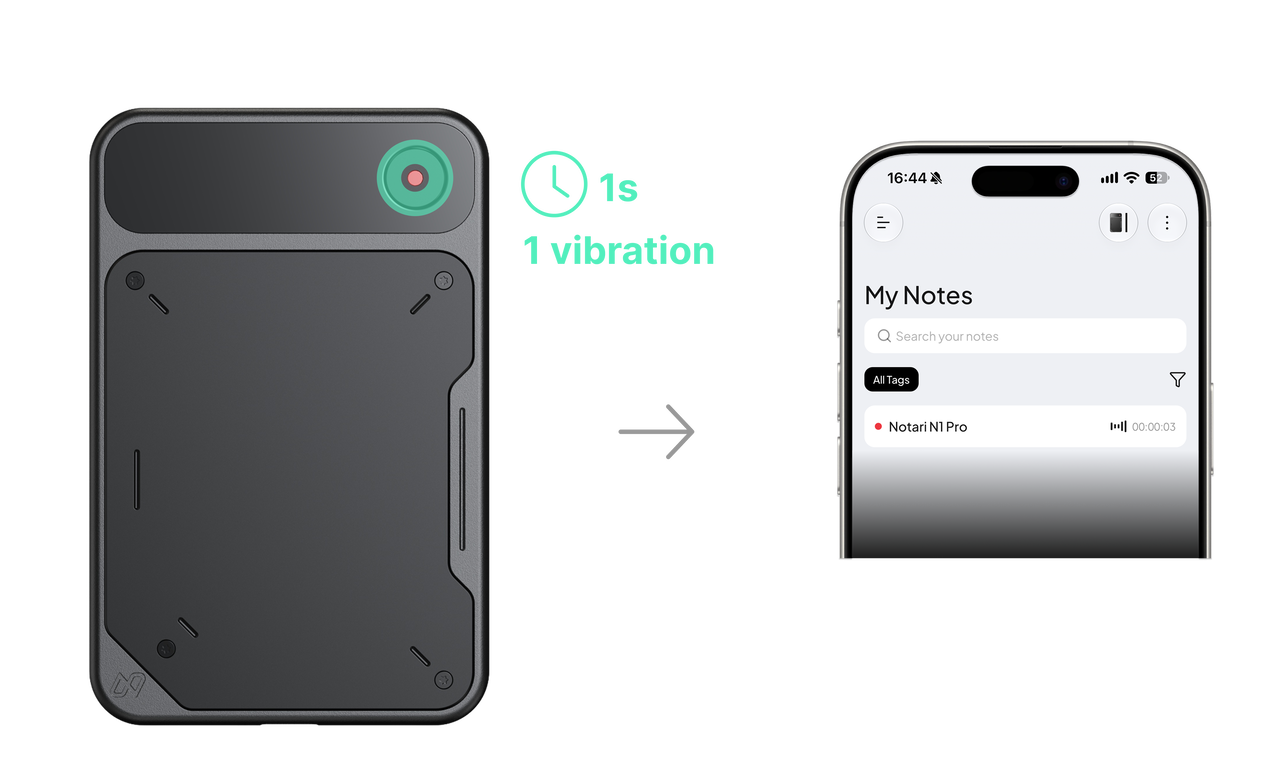
Press and hold the device button for 1 second. One vibration confirms recording has started; the app also shows the recording status.
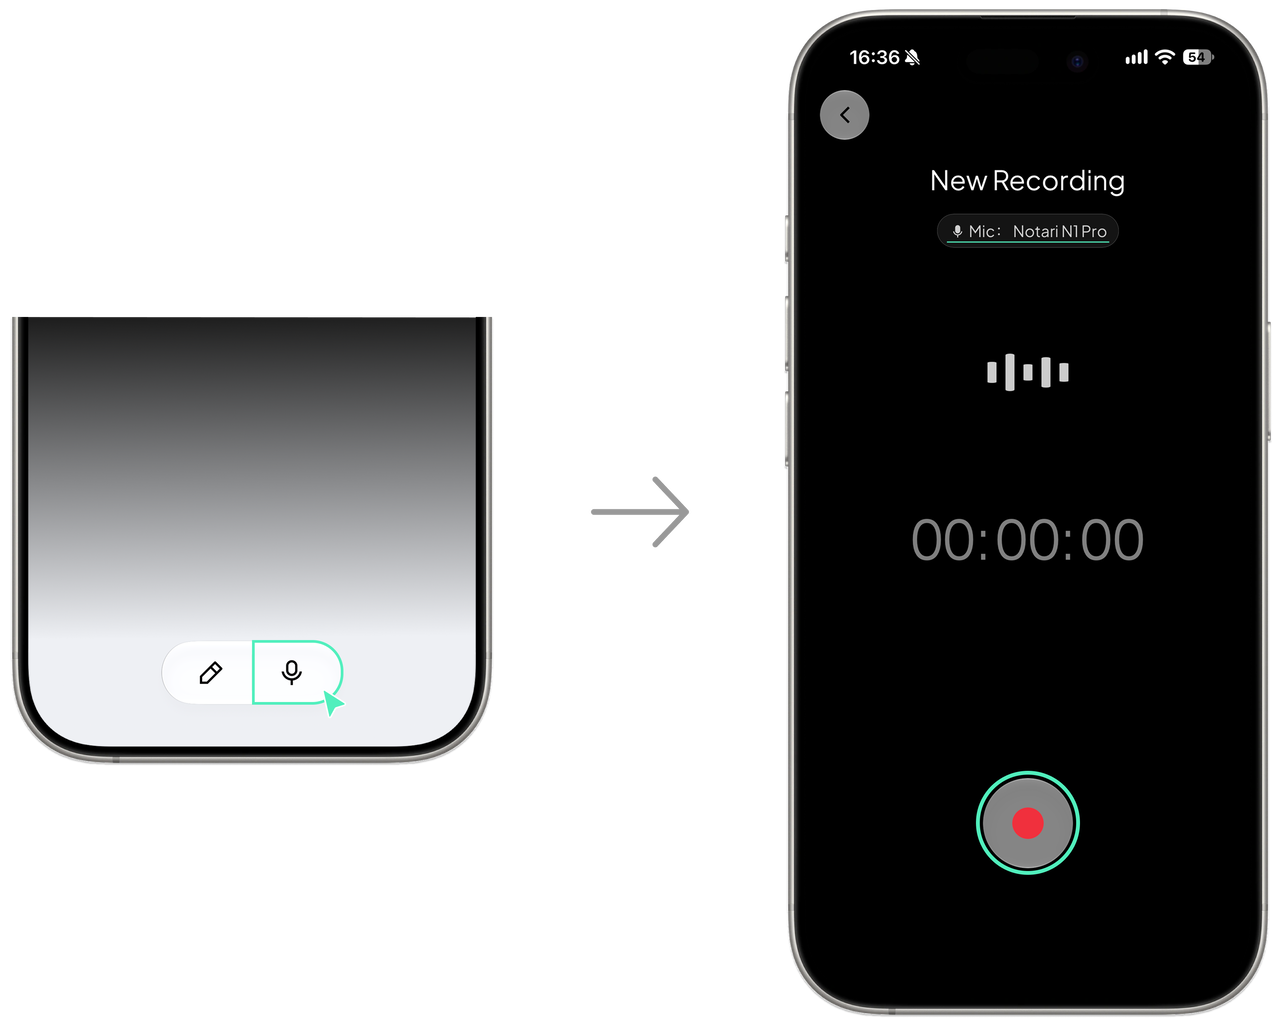
You can also tap the recording icon on the app’s home screen and select Notari N1 Pro to start recording.
Step 2: Pause or Resume
While recording, press the device button once to pause. Press it again to resume.
You can also tap the pause button in the app.
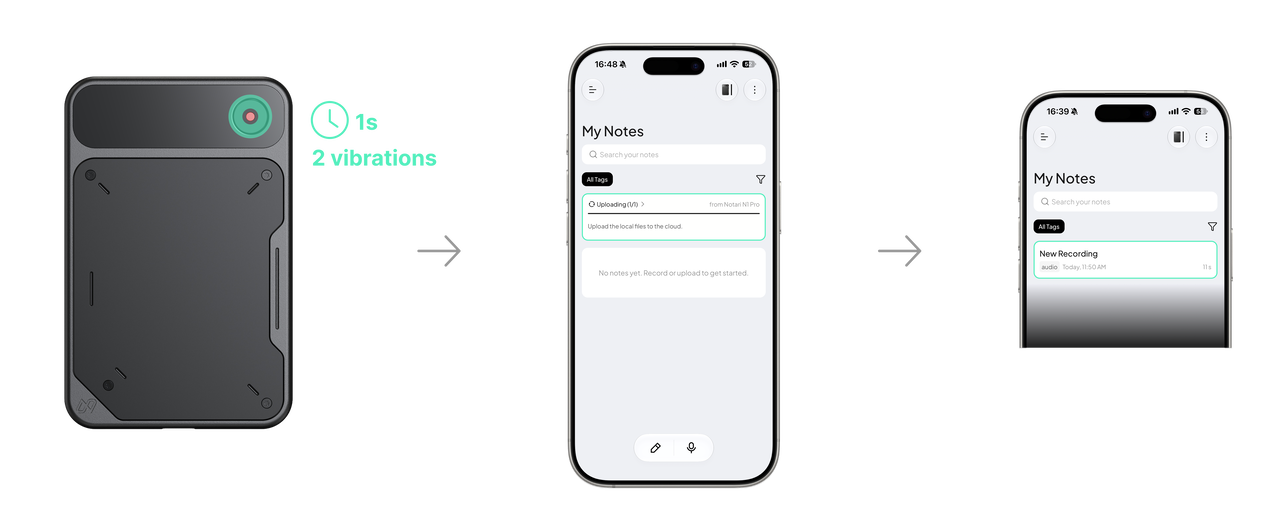
Step 3: Stop Recording
Press and hold the device button again for 1 second. Two vibrations confirm recording has stopped.
The recording automatically syncs and uploads to the app, appearing in My Notes. Open it to play the audio, transcribe it, or generate an AI summary.
Other Button Controls:
Press once while in standby: Wake the screen and check the battery level.
Hold for 10 seconds: Turn off the device.
4. AI Features: Transcription, Summaries, and Q&A
Recording is just the beginning.
Notari can turn audio into text, organize key points, and help you discover new ideas and possibilities within a conversation or note.
Transcribe a Recording
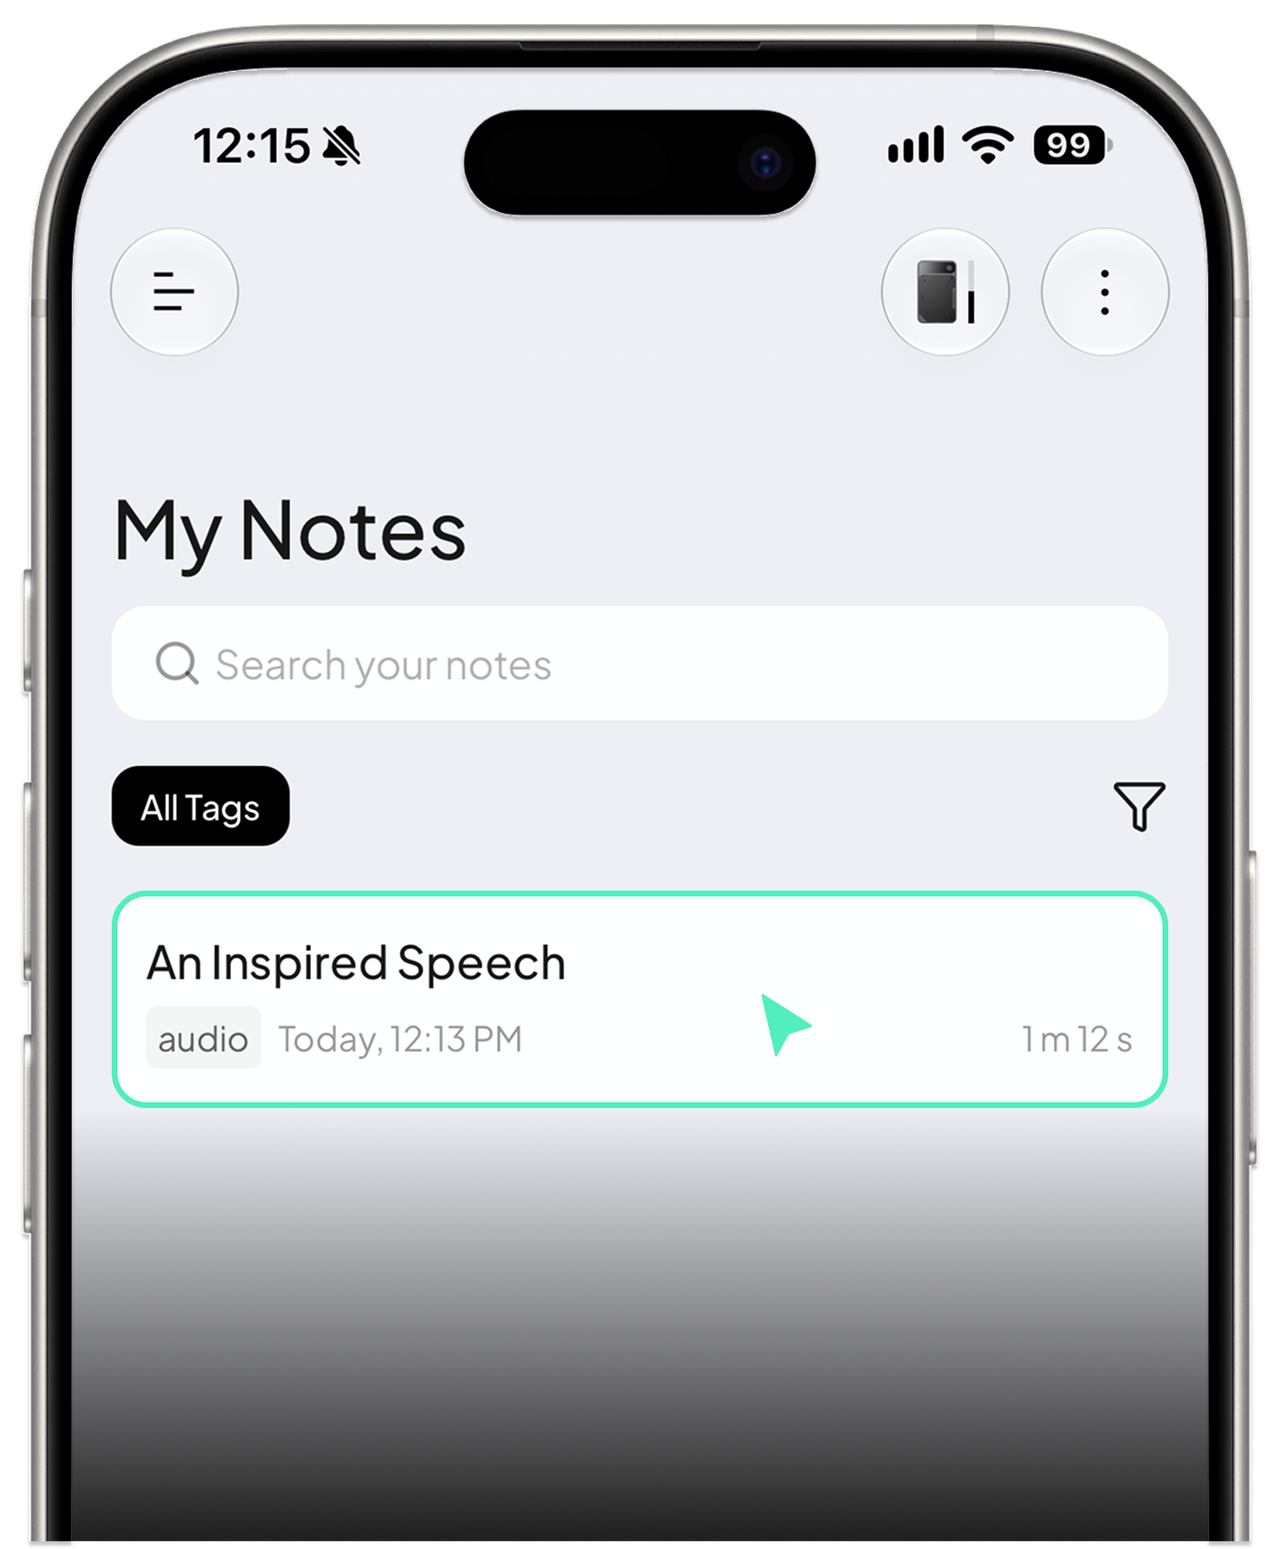
Step 1: Open the Recording
Go to My Notes and open the recording you want to process.
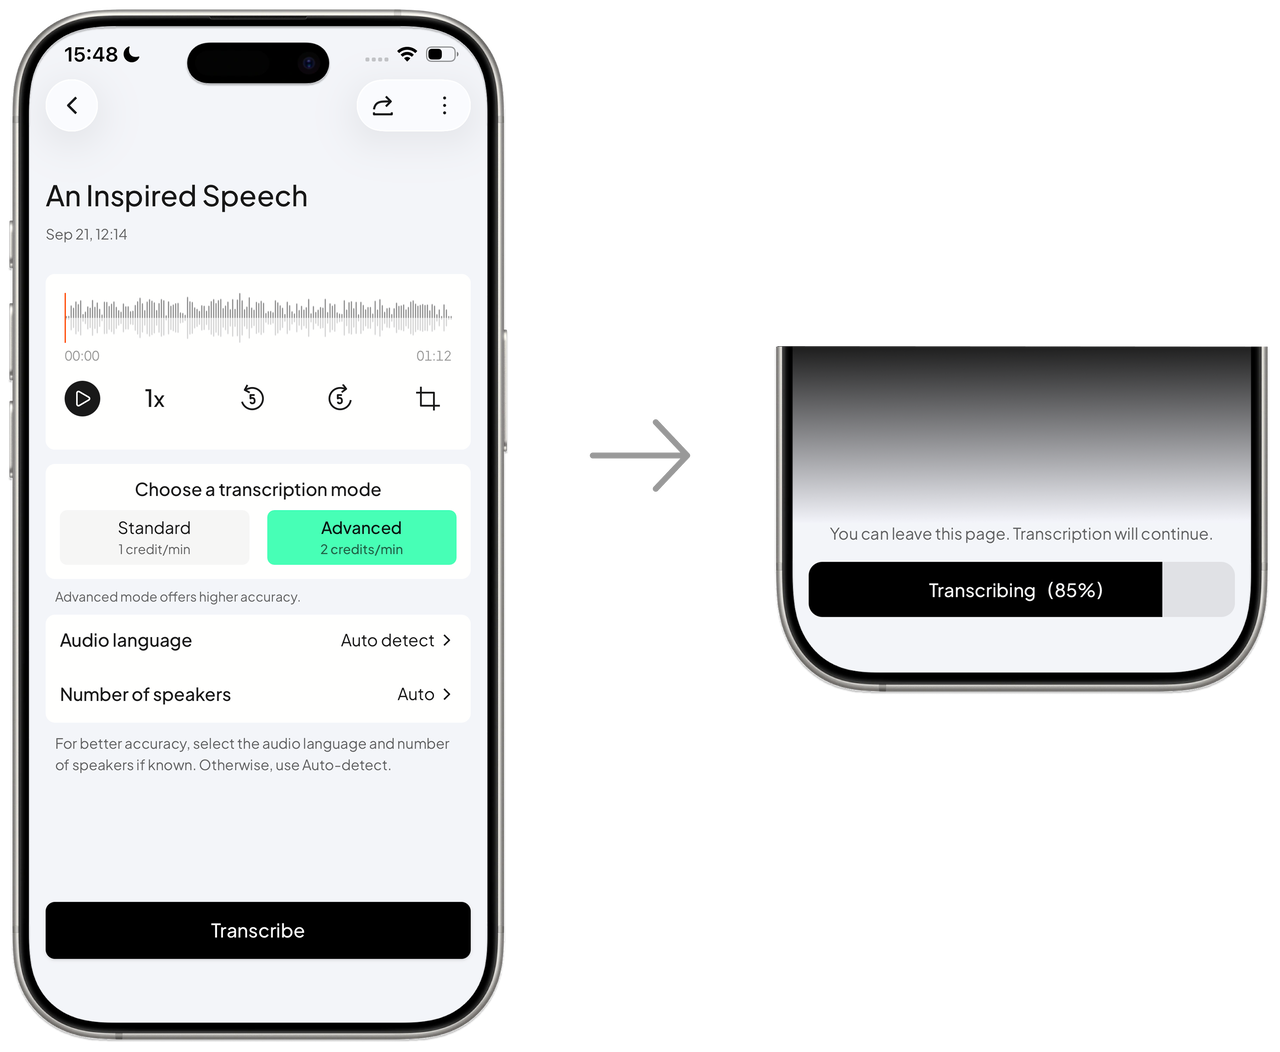
Step 2: Configure and Start the Transcription
On the transcription settings page, you can configure the following options:
Audio controls: Play back the recording, adjust the playback speed, fast-forward, rewind, or trim the audio.
Transcription mode: Advanced Transcription is more accurate than Standard Transcription but uses more credits. Advanced Transcription costs 2 credits per minute, while Standard Transcription costs 1 credit per minute. We recommend Advanced Transcription for important recordings.
Recording language: Use Auto Detect or manually select the language spoken in the recording to improve transcription accuracy.
Number of speakers: Use Auto Detect or manually select the approximate number of speakers to improve transcription accuracy.
Tap Transcribe to begin.
Step 3: View the Transcript
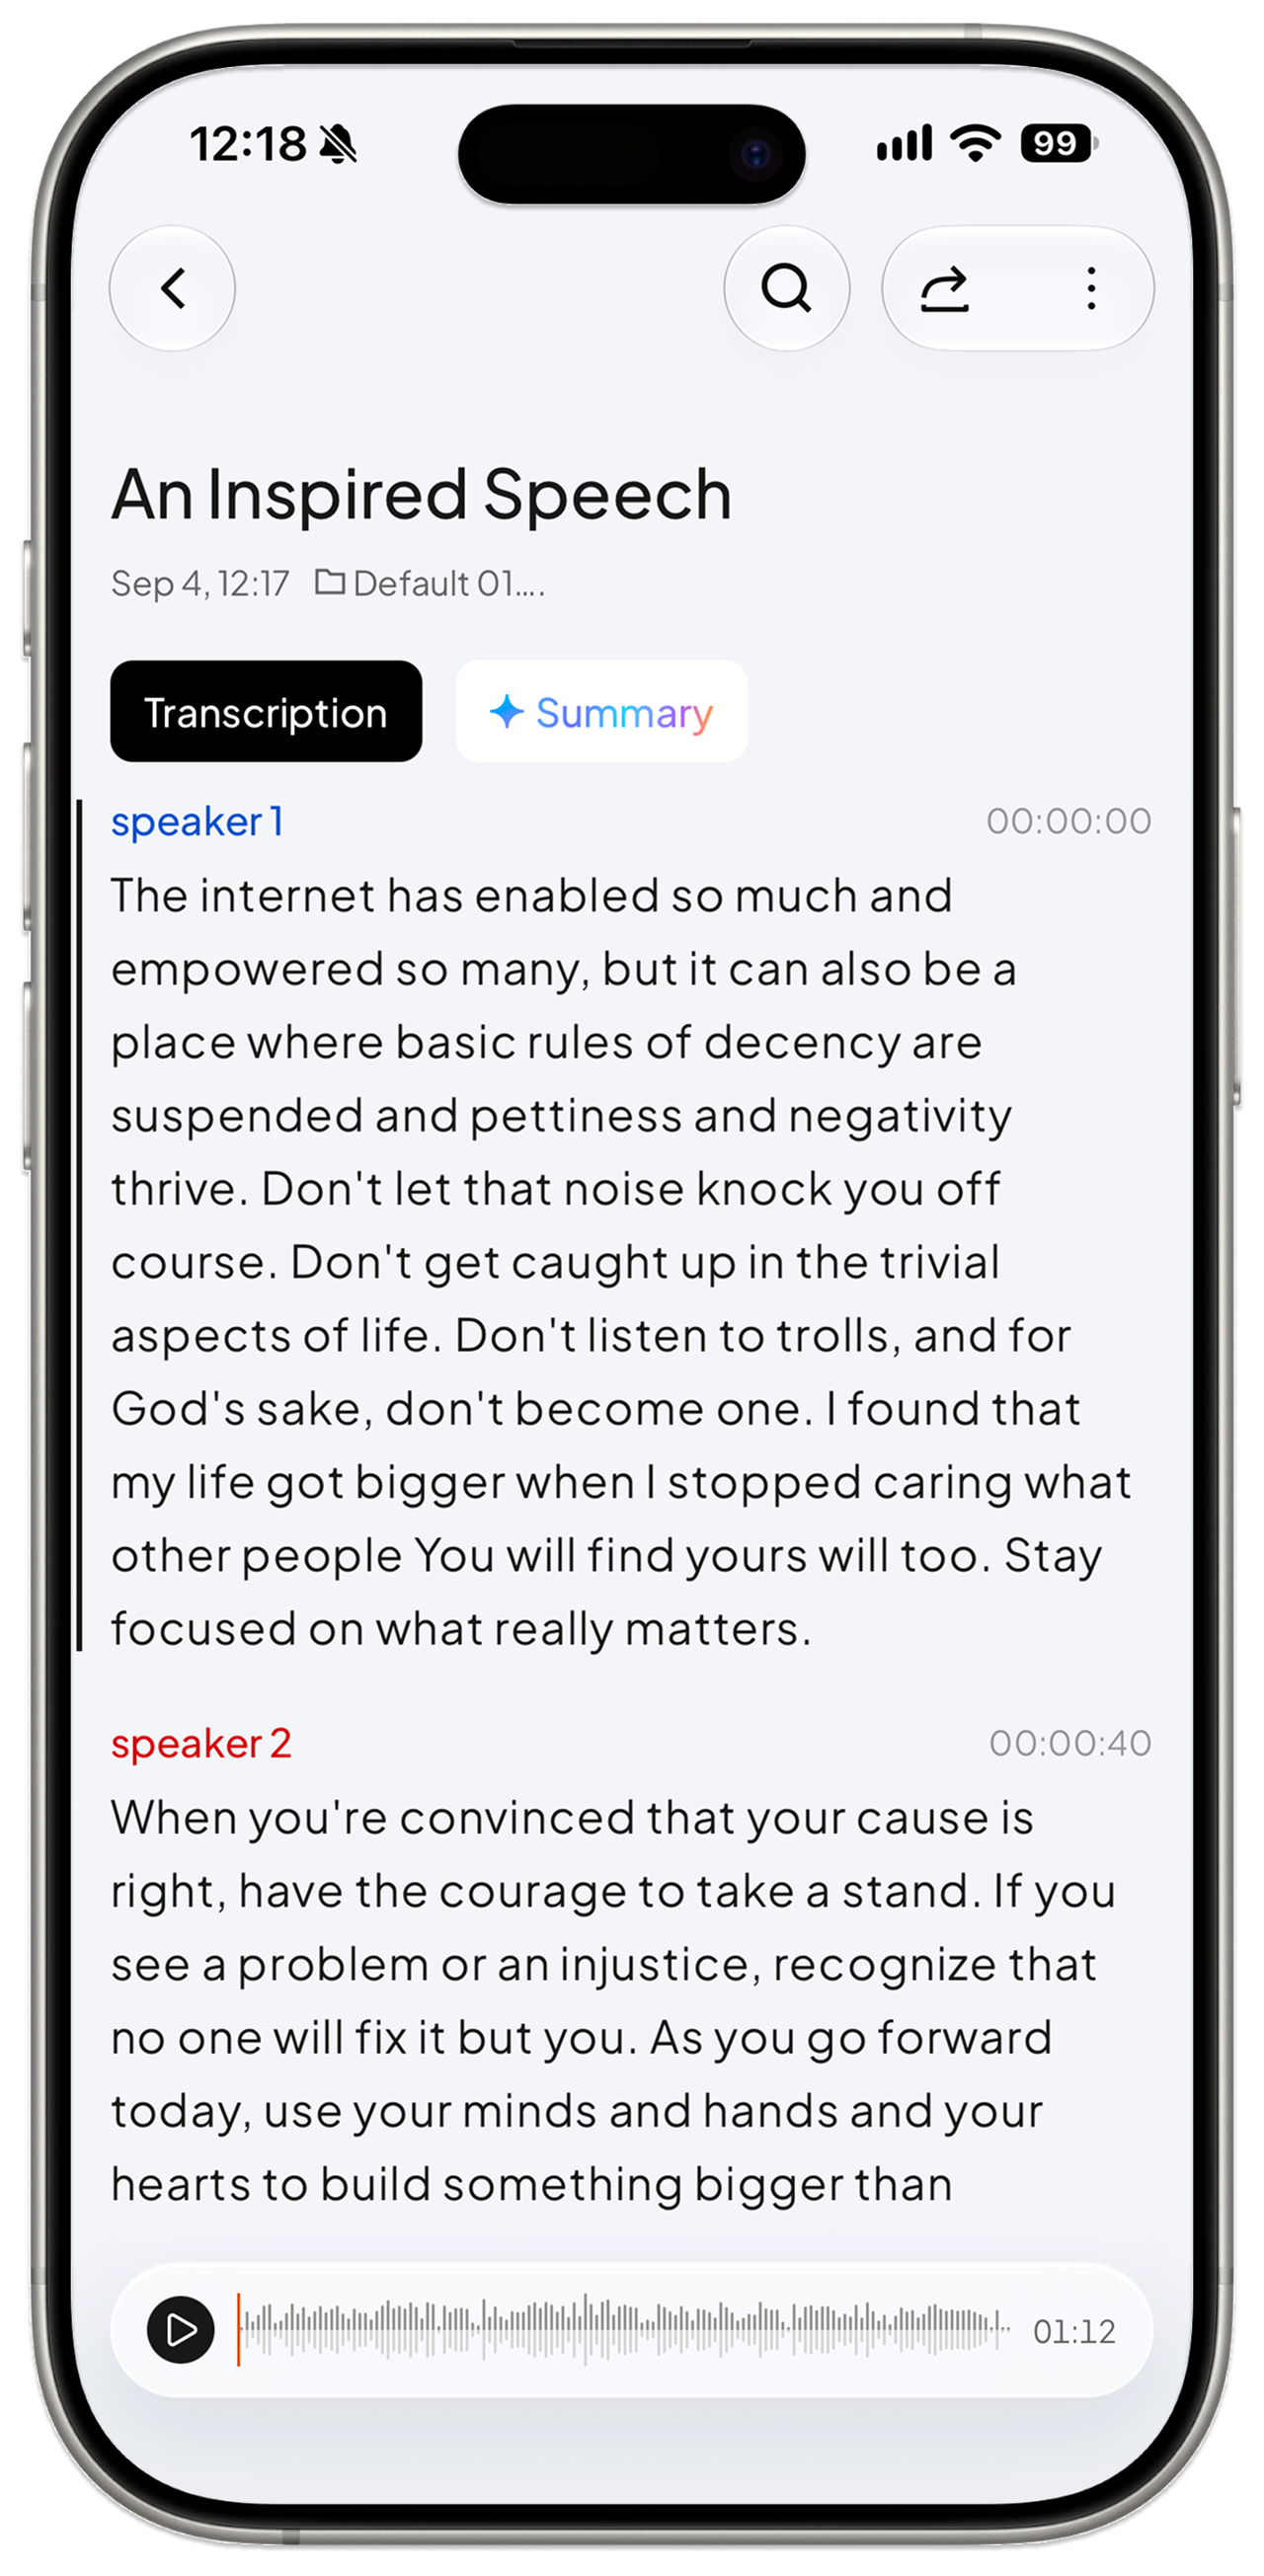
Once the transcription is complete, you can view:
The full transcript with timestamps
Different speakers
The original recording
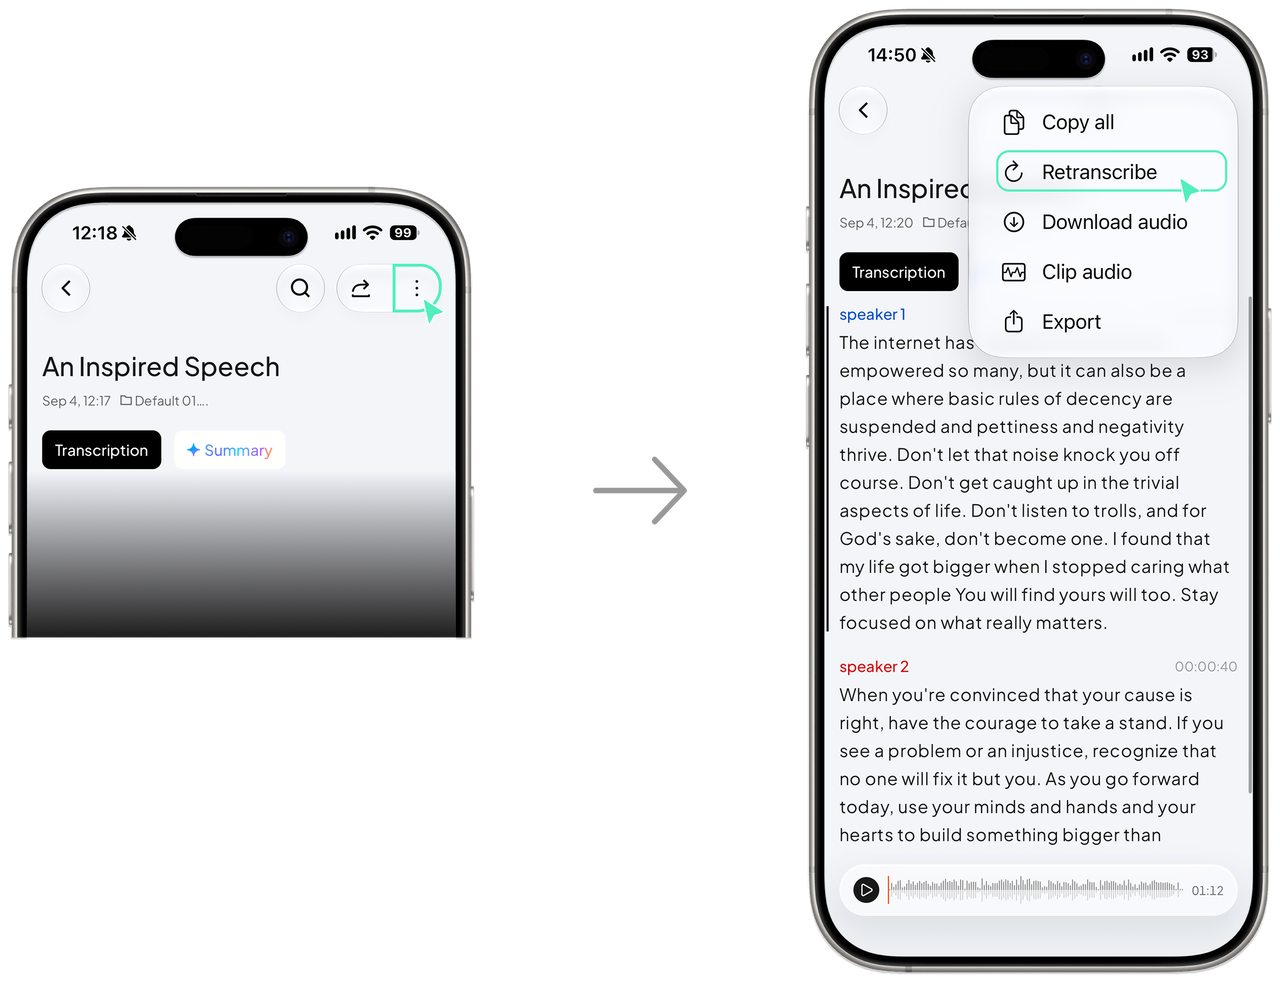
What If the Transcript Is Inaccurate?
Tap Retranscribe and check:
Whether the recording language is correct
Whether the number of speakers is correct
Whether you should enable Advanced Transcription
You can also edit the transcript manually before asking AI to generate a summary.
Generate an AI Summary and Ask Questions
Once the transcription is complete, AI can quickly organize the key points, important ideas, and topics worth exploring further.
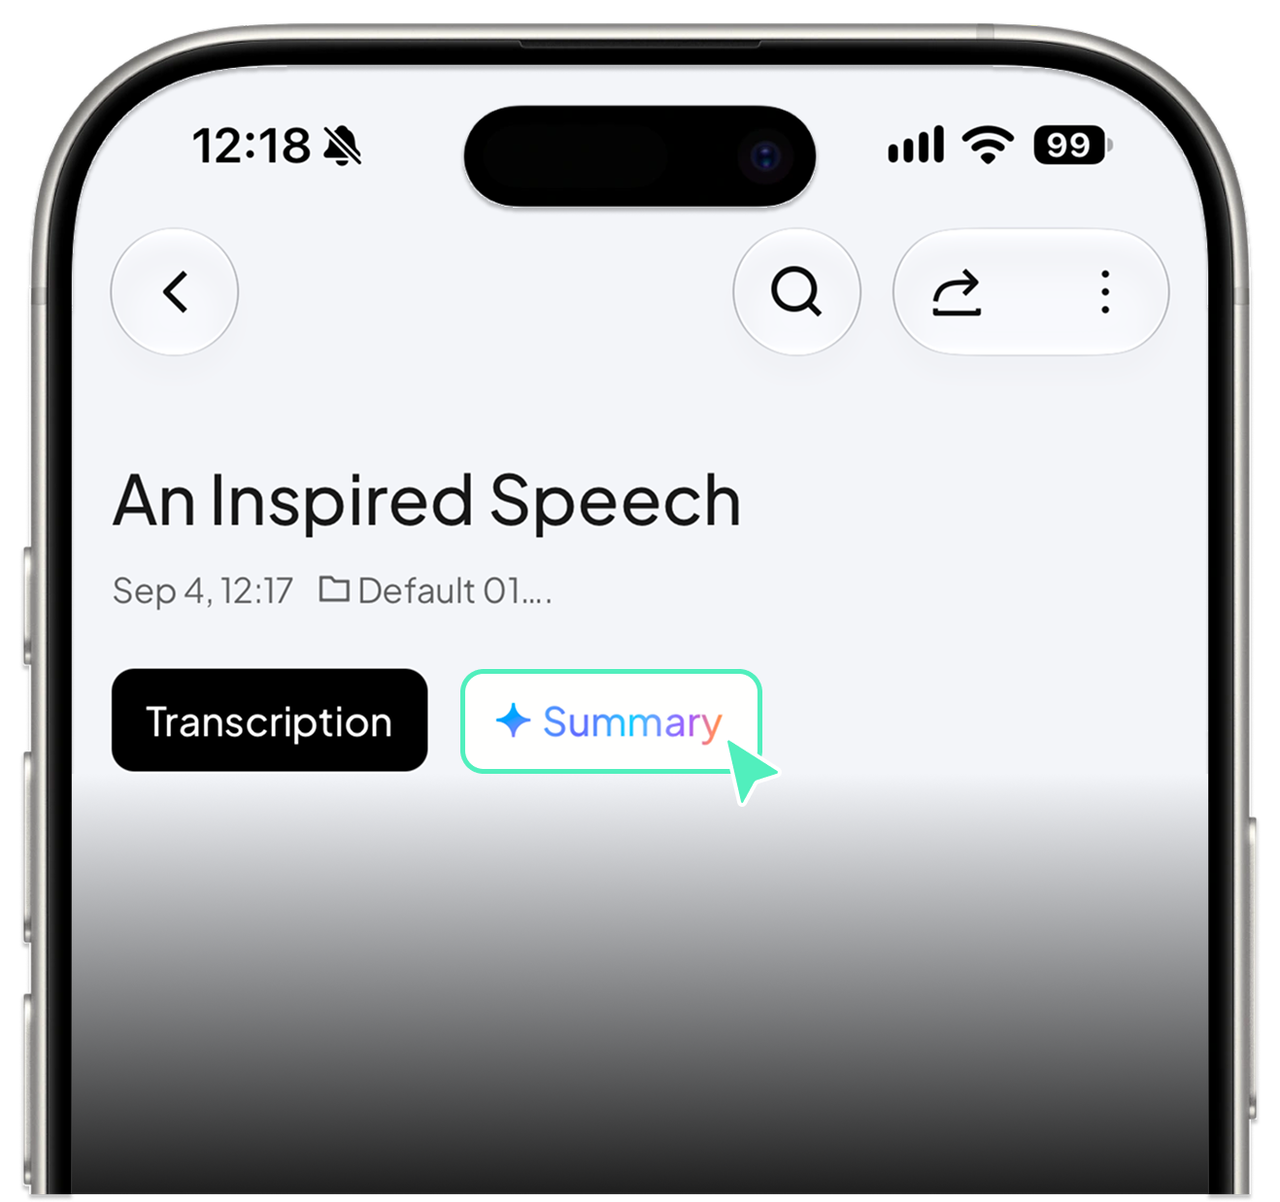
Step 1: Open AI Summary
On the recording details page, tap Summary.
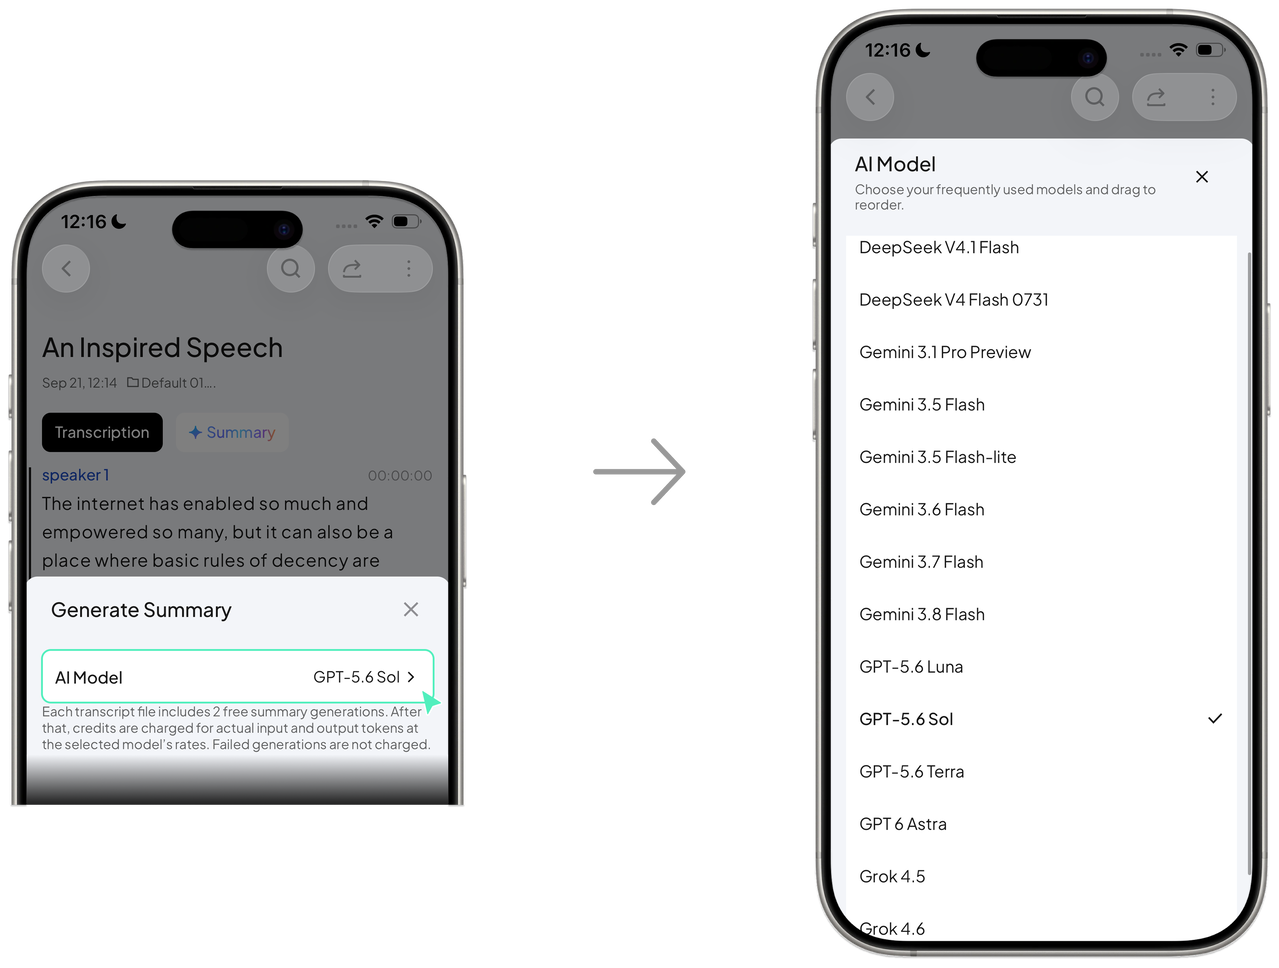
Step 2: Select an AI Model
Choose the AI model you want to use.
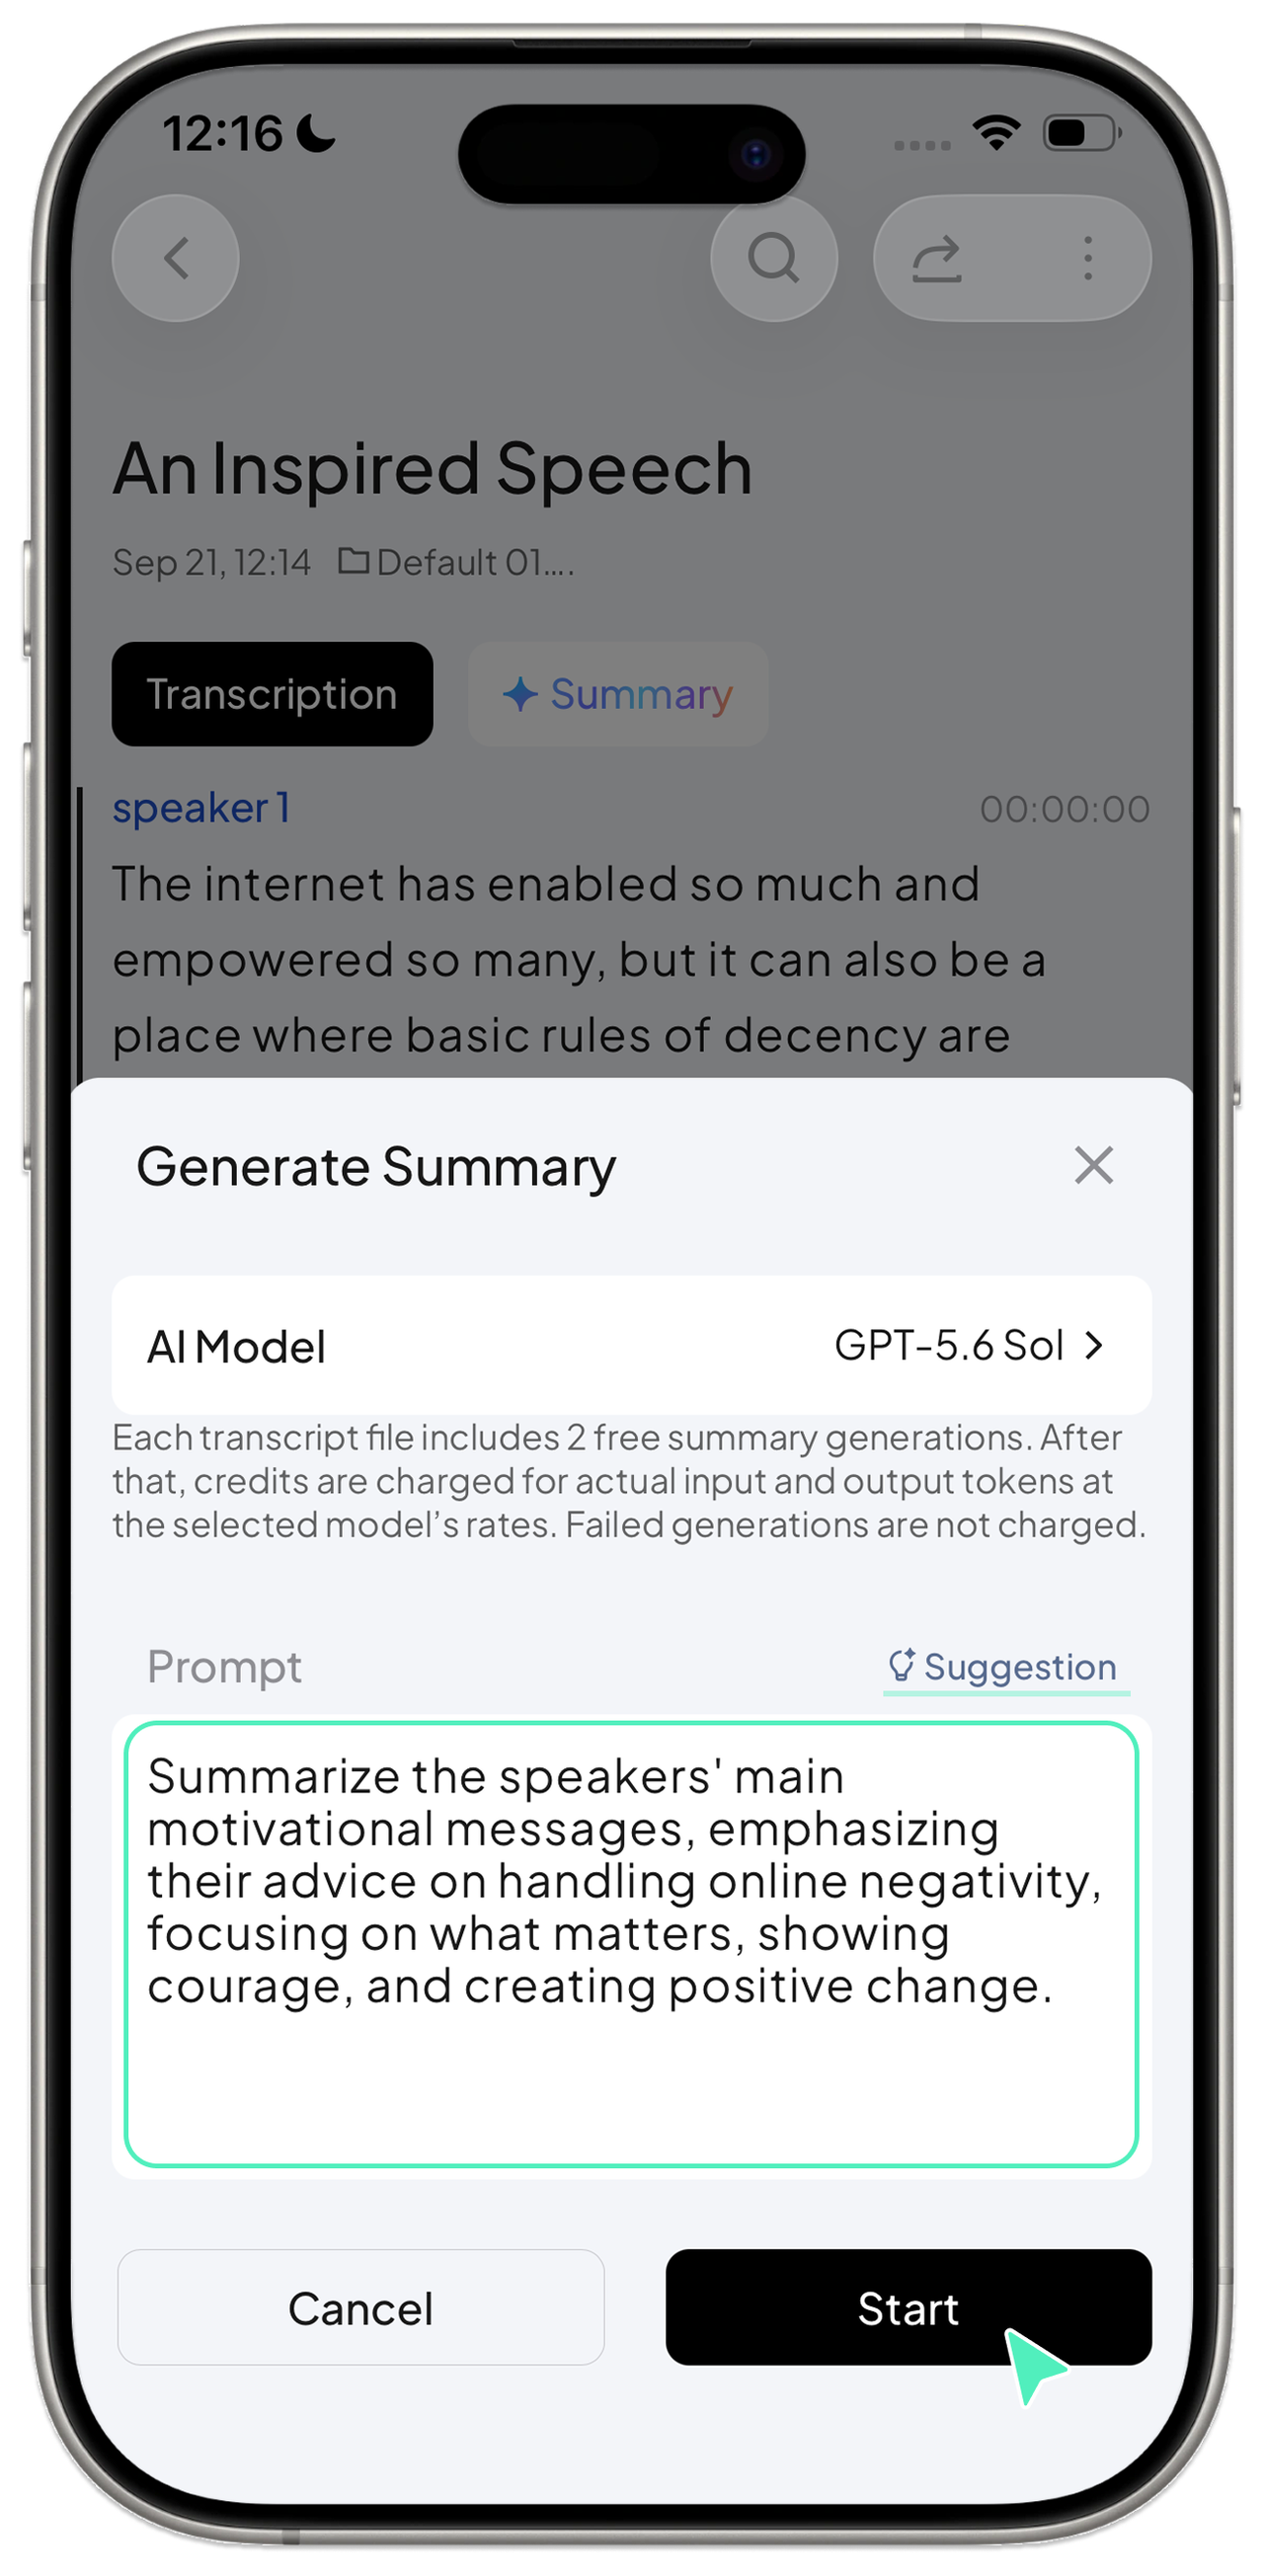
Step 3: Enter Your Summary Instructions
You can:
Tap Suggestion to use an AI-recommended prompt.
Enter your own summary instructions.
Tap Start and wait a moment for the result.
Step 4: Generate the Summary
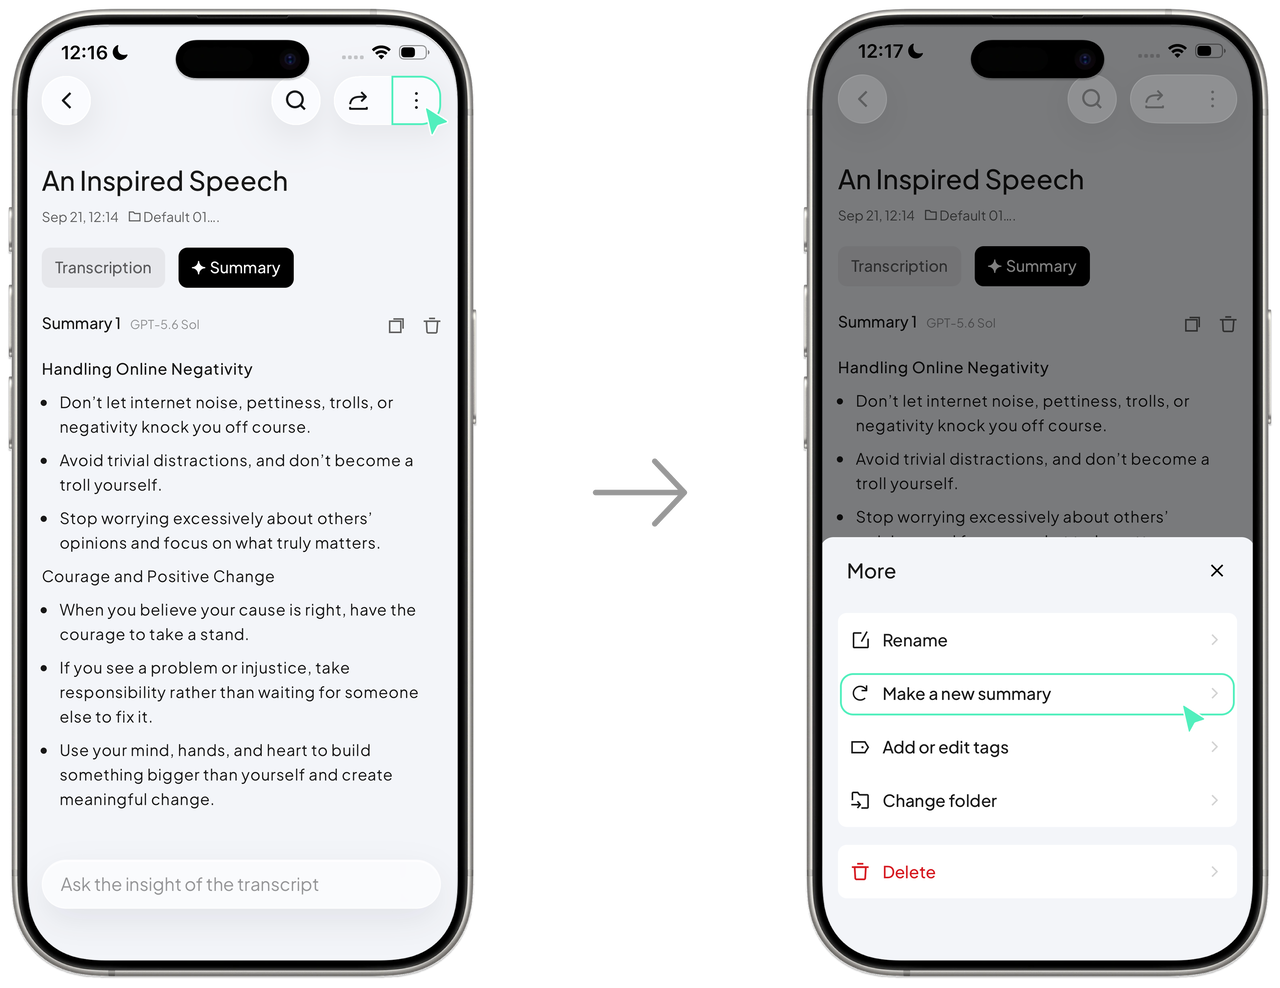
The generated summary will appear under Summary. To create a different version, tap Make a new Summary.
Step 5: Ask AI Questions
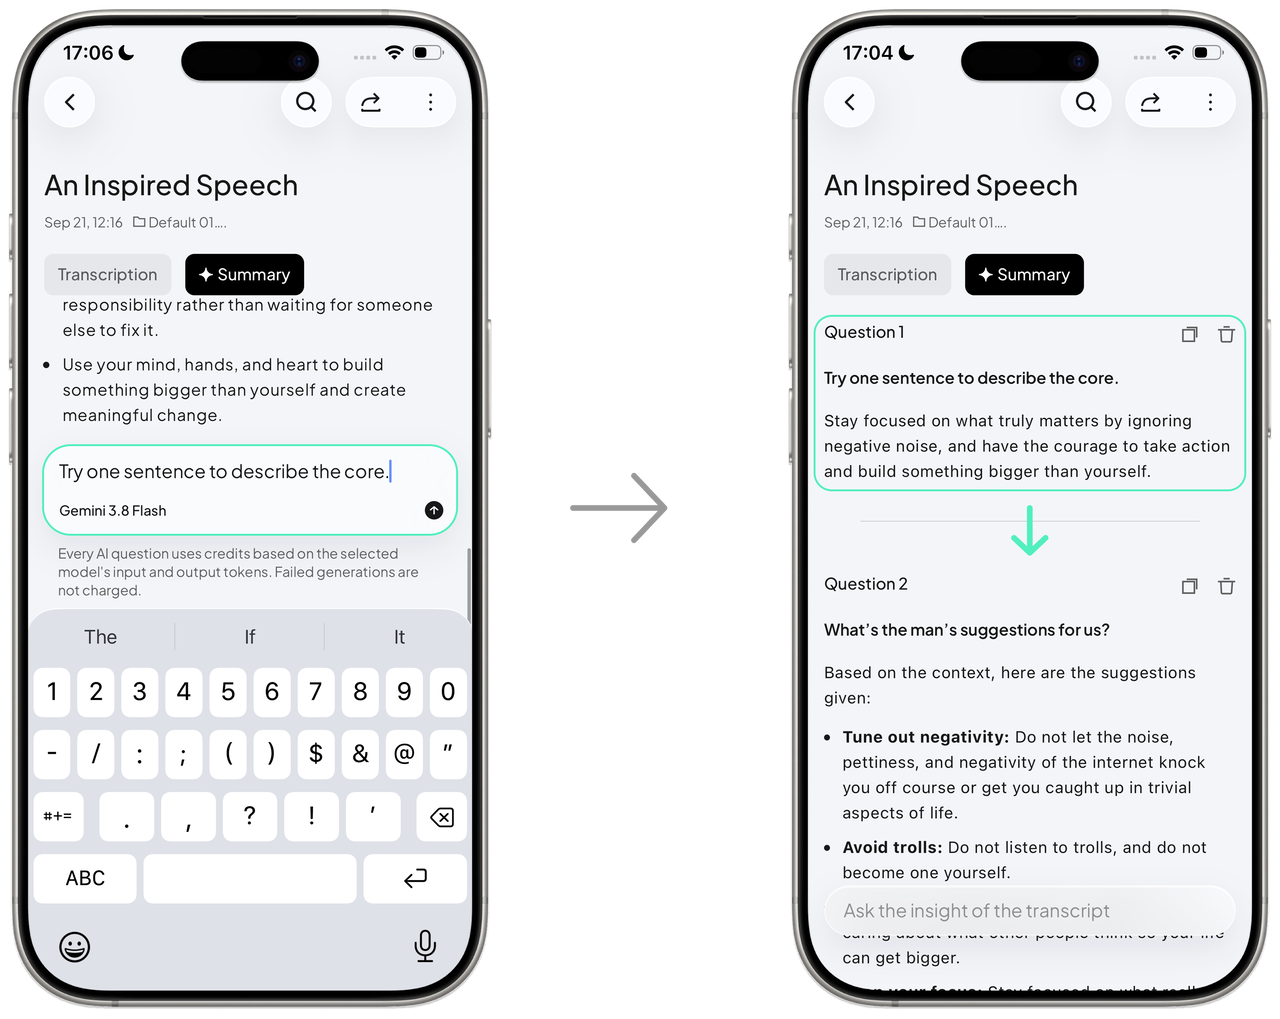
AI Q&A can help you find answers quickly and further organize the ideas, feelings, and connections within a conversation.
Enter a question in the chat box to receive an answer. You can also continue with follow-up questions.
5. Text Notes
If you do not want to record, you can write a note instead.
You can capture your thoughts after a conversation, observations from a trip, or a new idea as it arises.
You can also paste in an interesting article and ask AI questions at any time, allowing your ideas to develop further.
Step 1: Open the Note Editor
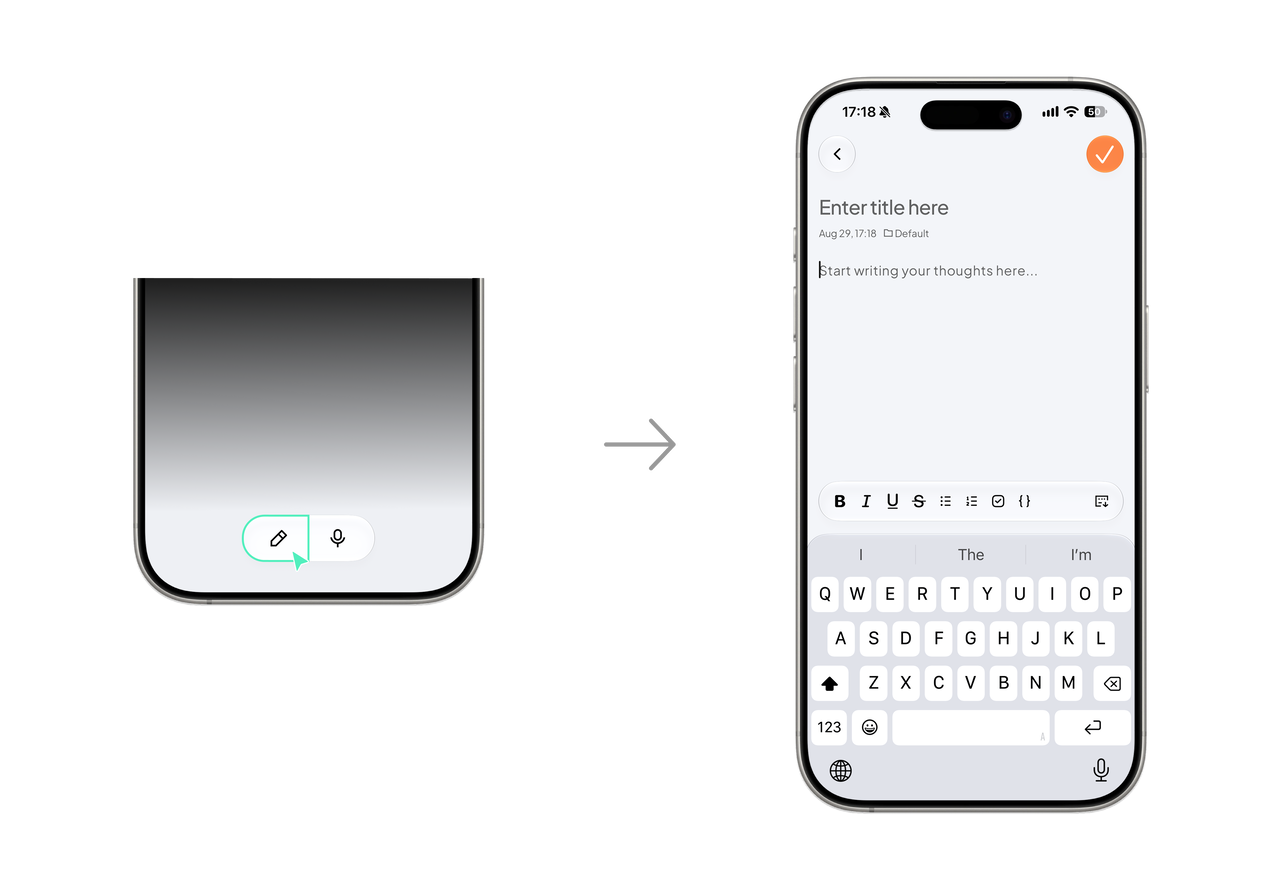
Tap the Write Note button on the App home screen to open the note editor.
Step 2: Enter Your Content
Enter anything you want to save, such as:
Thoughts after talking with family or friends
Travel observations and everyday moments
Reflections from books, films, or courses
Recipe experiments, workout plans, or meeting notes
Story concepts and creative ideas
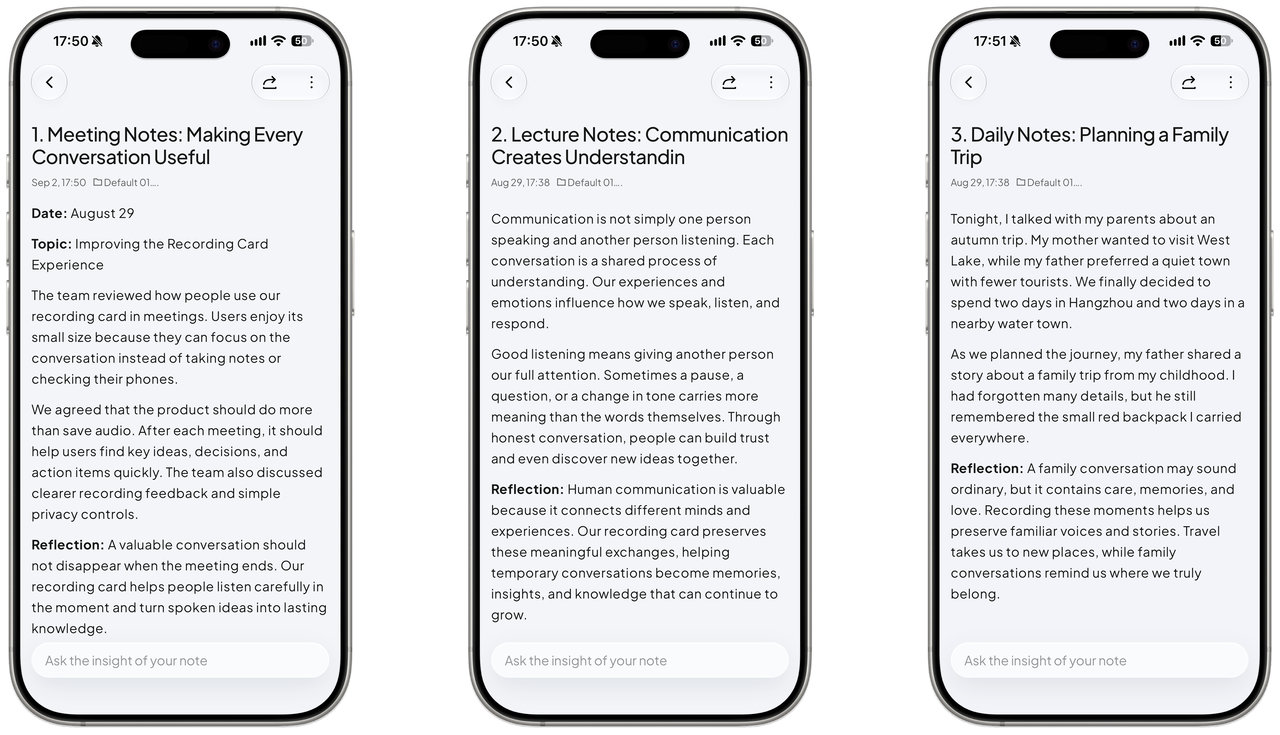
When you are finished, tap ✓ to save.
Your note will appear in My Notes.
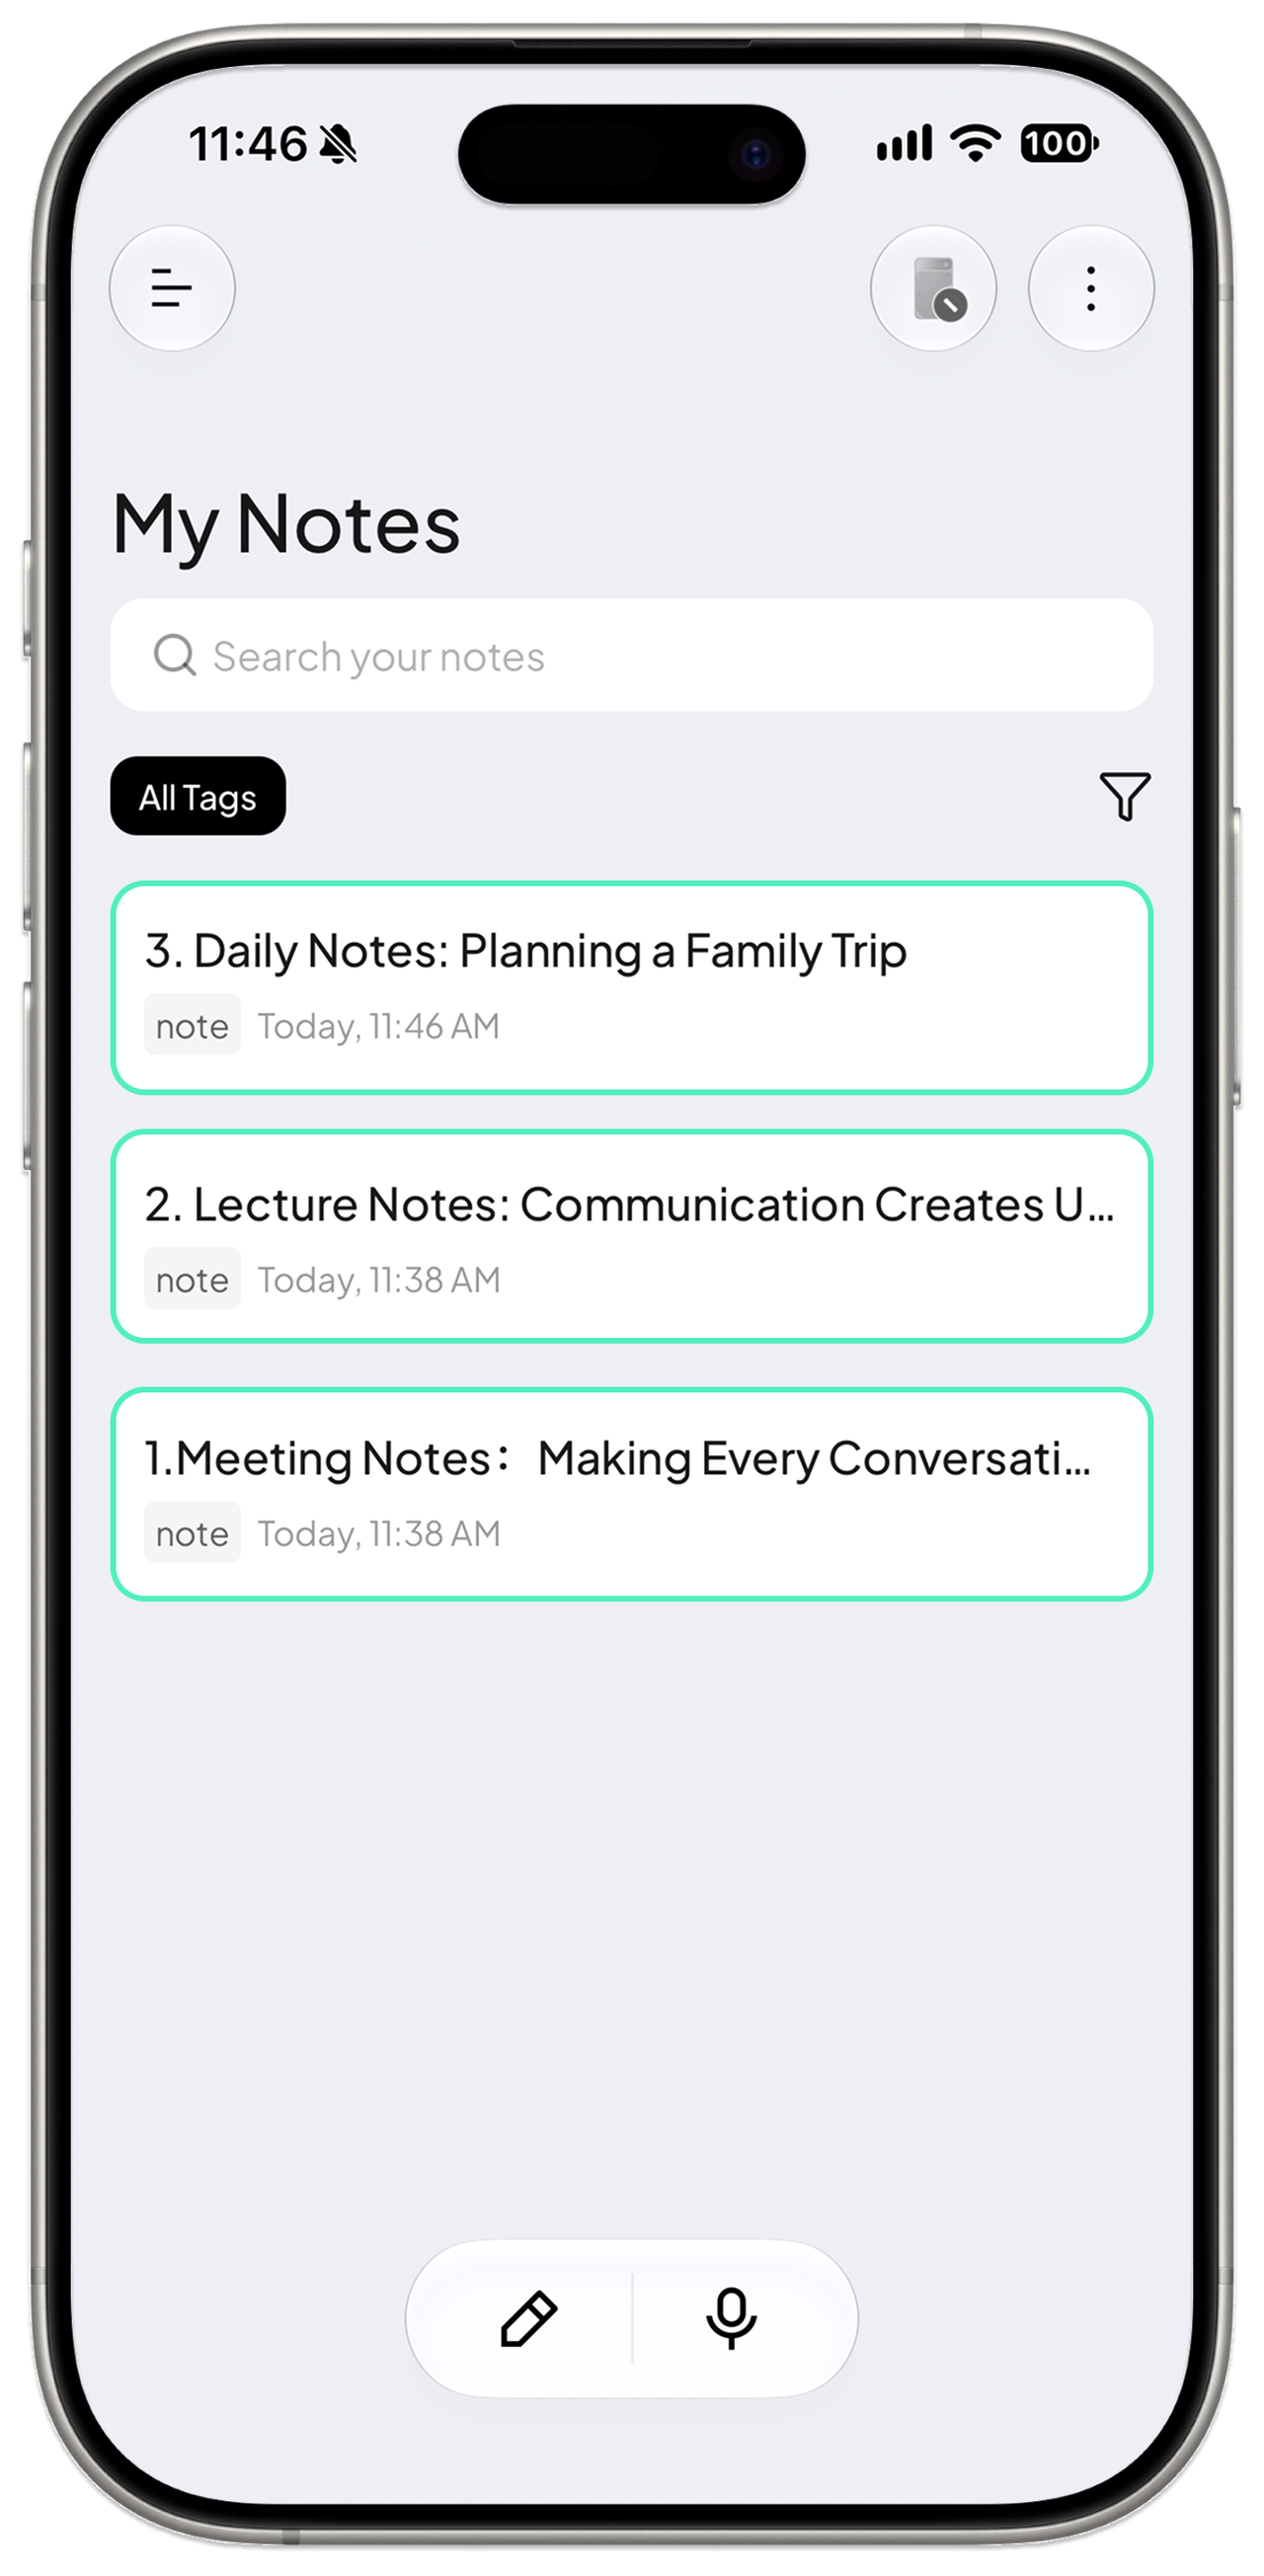
Step 3: Edit Notes and Ask AI Questions
You can edit, delete, or add content to a saved note at any time.
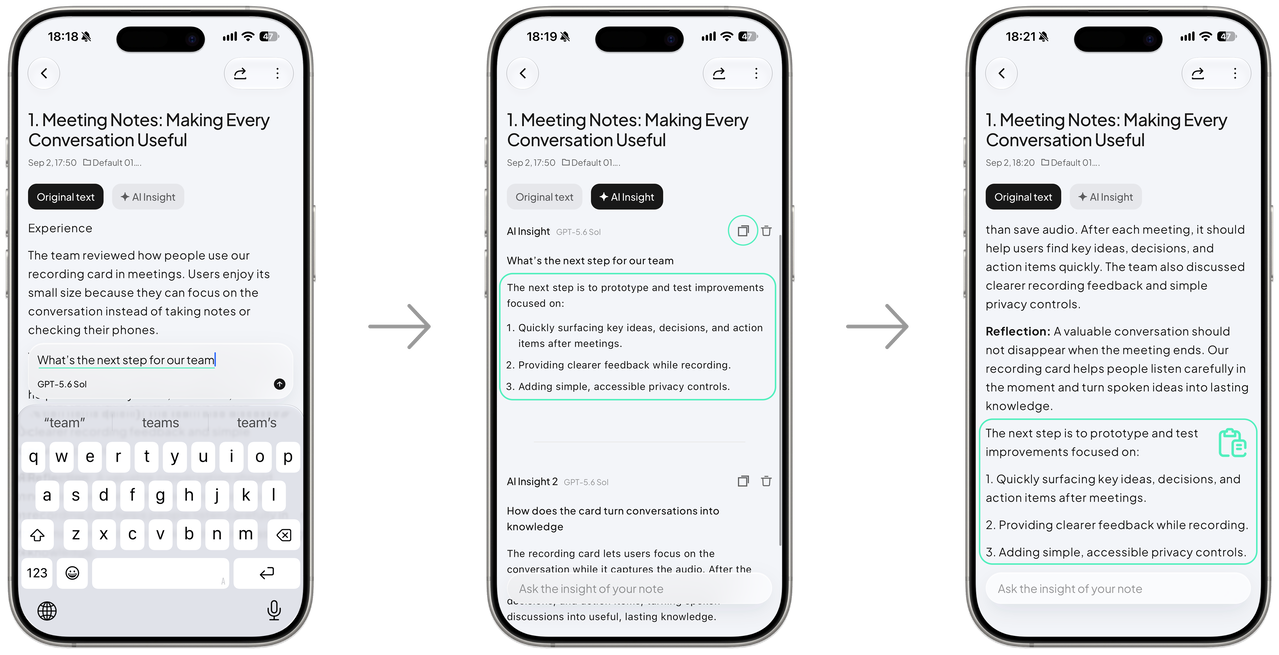
Text notes also support AI Q&A. Open a note and scroll down, then enter your request in the text box. AI can summarize the content, organize your ideas, or help you rewrite it.
AI Q&A supports multi-turn conversations. You can quickly copy responses you like and paste them into your note.